 |
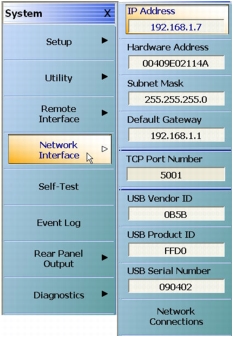
We want to communicate to VectorStar using VXI-11 (TCP/IP) so we’ll need to note the IP Address of the VNA and set up a resource (a connection string). |
|
We want to communicate to VectorStar using VXI-11 (TCP/IP) so we’ll need to note the IP Address of the VNA and set up a resource (a connection string). |
 |
We’ll set up a resource in NI-MAX. The programs will reference this resource rather than a specific address. |
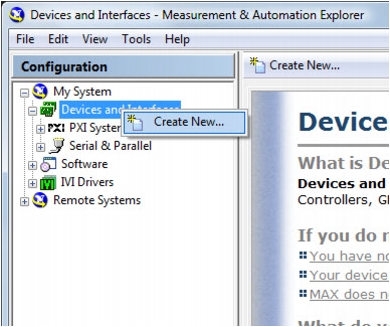 |
Create a new resource. |
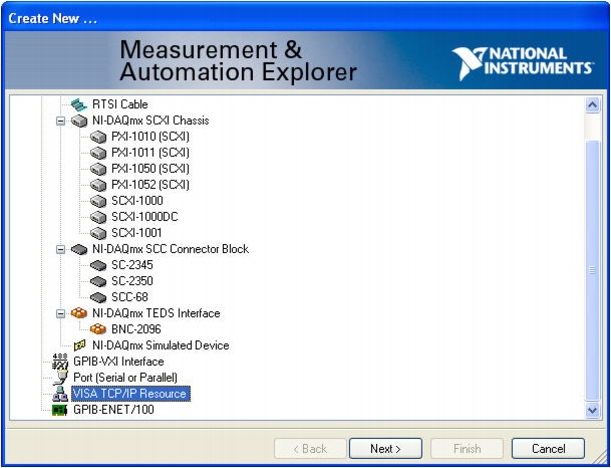 |
Select VISA TCP/IP Resource. |
 |
If the controlling pc and the VNA are on the same local sub-network (this is usually true if the first 3 numbers in the IP address are the same ─ for example, 192.168.1.x in this case), then you can probably Auto-detect the VNA. |
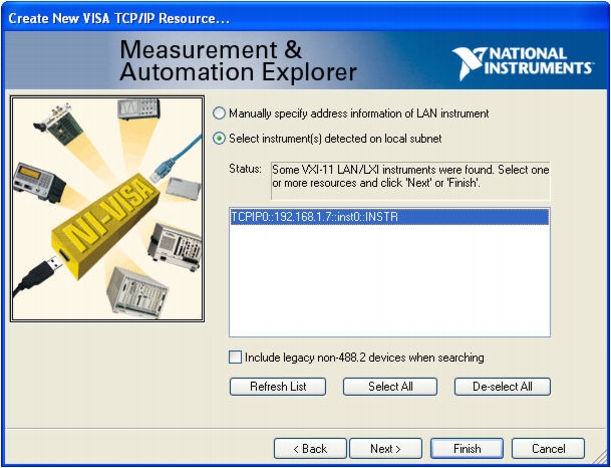 |
Select the detected instrument. |
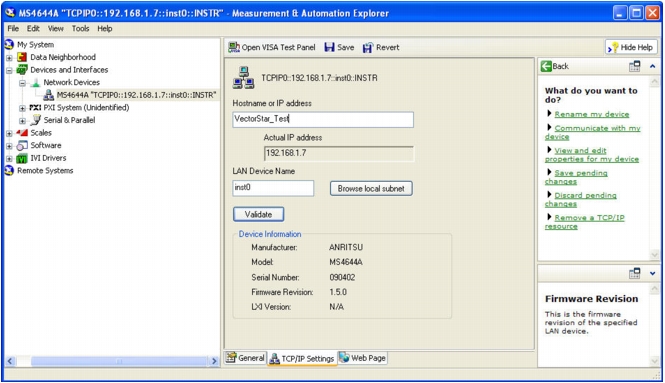 |
Give the instrument an alias. Later on we’ll use this alias in LabWindows/CVI. |
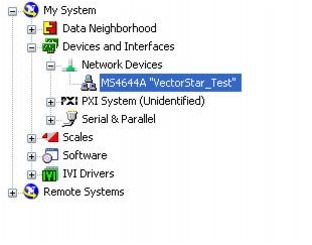 |
Note that the VISA connection string has been replaced with the VISA alias. |
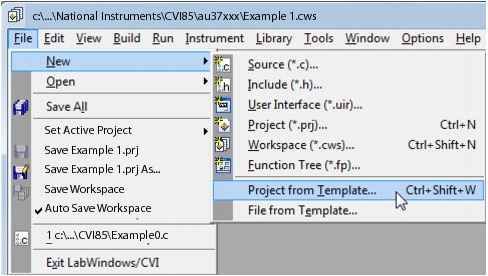 |
Now back in LabWindows/CVI we’re ready to start creating the first example. We’ll create a new Project from Template. |
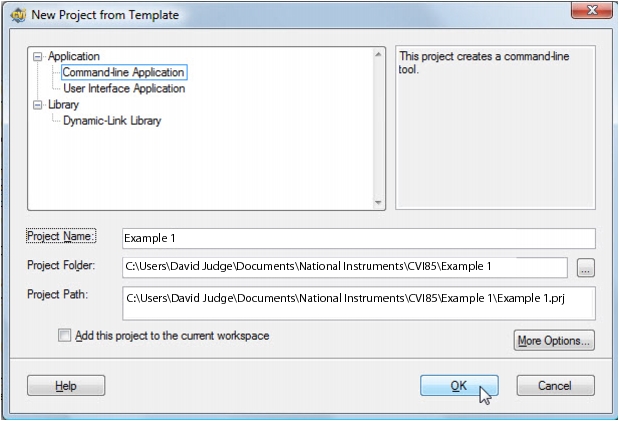 |
We’ll use the Command-line Application Template. |
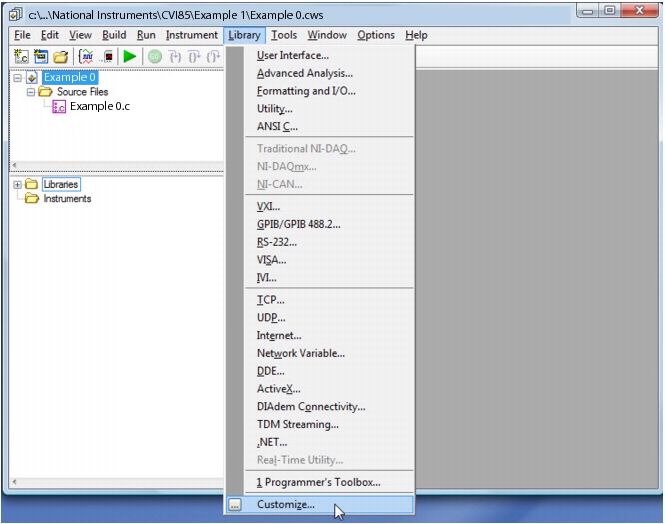 |
Go to Library | Customize to have CVI load the driver into our user Library every time CVI starts. This is a preferable way to have access to the driver. |
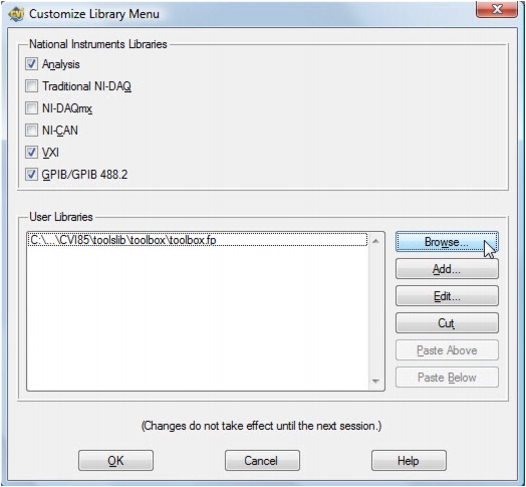 |
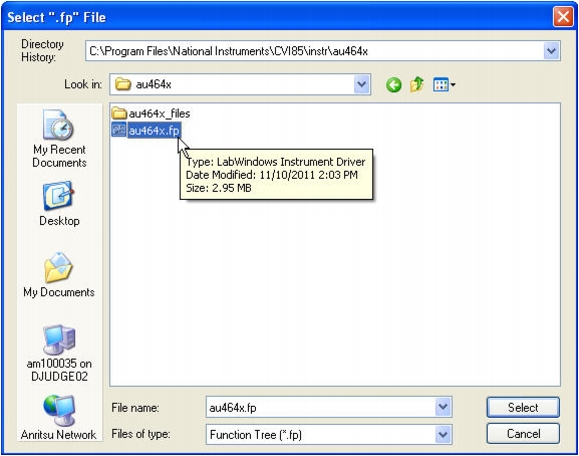
We’ll Browse to find the au464x.fp file. |
 |
Add the Function Tree (“.fp”) file. |
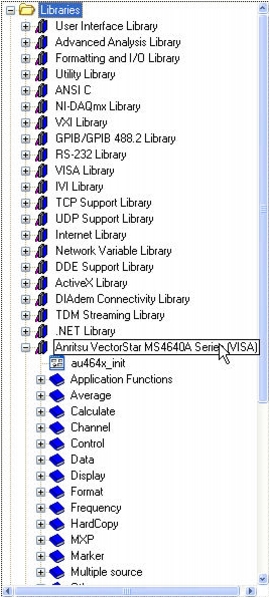 |
The driver is now in the Libraries folder. |
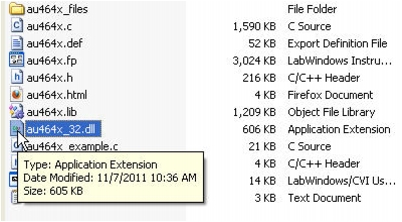 |
Finally, we’ll need to copy the driver DLL to someplace on the on the system path. If you don’t know or care what the system path is, then just copy the file to C:\Windows\System32. |
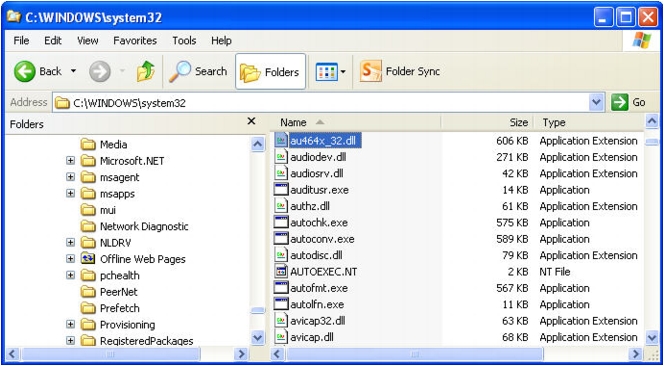 |
Here we’re copying the DLL to C:\Windows\System32. This step seems strange but it’s necessary. There are other places to put the DLL, if you’re interested, so check the LabWindows/CVI documentation. |