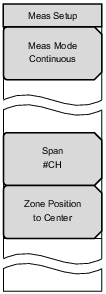
 | For additional details, refer to Spectrum Monitor, Custom. Meas Mode Press this submenu key to open the Select Meas Mode list box. Use the Up/Down arrow keys or the rotary knob to highlight the desired measurement mode and then press Enter. Choose from: Single and Continuous. For a description of these modes, refer to Select Meas Mode List Box (Custom). Span Press this submenu key to open the Select Span list box and select the number of channels to display on the measurement screen (graph). Use the Up/Down arrow keys or the rotary knob to highlight the desired number of channels to span, and then press Enter. Refer to Table: Span Options with Associated RBW, VBW, and Detection Parameters for the RBW, VBW, and Detection parameters for each Span setting. The values that are shown in this table are set internally and are not displayed on the instrument screen. Six span options are available: 1 CH, 3 CH, 5 CH, 11 CH, 31 CH, and 51 CH. The Span setting can be incremented (stepping through the six settings that are available in the Select Span list box) by pressing the Up/Down arrow keys. Zone Position to Center Press this submenu key to move the currently marked channel (the channel that is within the green zone markers) to the center of the measurement display (the center of the sweep window). This also executes a measurement. Scrolling with the rotary knob moves the green zone markers to adjacent channels. The channel number, frequency, and power level are displayed in green in the upper‑right corner of the graph for the channel that is within the green zone markers. Note: A blue diamond‑shaped marker (within the green zone markers) indicates frequency and level information of the peak value within the channel. The data is displayed in blue in the upper‑right corner of the graph. This is an automatic function that has no user controls. |