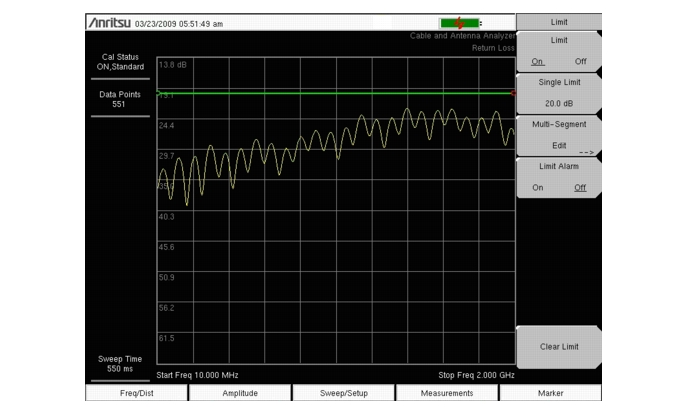
Limit lines can be used for visual reference only, or for pass/fail criteria using the limit alarm. Limit alarm failures are reported whenever a signal is above the upper limit line or below the lower limit line.
Each limit line can consist of a single segment or as many as 40 segments across the entire frequency span of the instrument. These limit segments are retained regardless of the current frequency span of the instrument, allowing the configuring of specific limit envelopes at various frequencies of interest without having to re-configure them each time the frequency is changed. To clear the current limit setup configuration and return to a single limit segment starting at the current start frequency and ending at the current stop frequency, press the Clear Limit submenu key.
The Limit On/Off submenu key turns the currently limit line on or off.
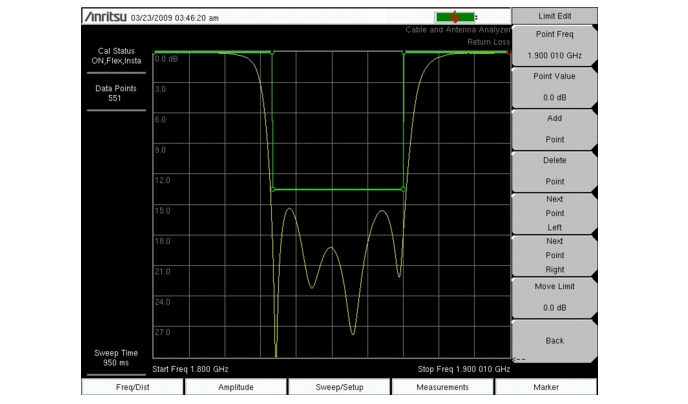
The Multi-Segment Edit submenu key displays a submenu that allows the creation or editing of single or multi-segment limit lines. The currently active limit point is marked by a red circle on the display.
The Limit Alarm submenu key enables the alarm to beep when a data point exceeds the limit.
The Clear Limit submenu key deletes all limit points for the currently active limit line and defaults to a single limit whose amplitude value will be selected to make it visible on the screen. The other limit line is not altered.
|
1.
|
|
2.
|
Press the Limit On/Off submenu key to turn on the limit line.
|
|
3.
|
Press the Single Limit submenu key to set the amplitude value of the limit line.
|
 |
|
1.
|
|
2.
|
|
3.
|
The default limit line has two points. In this example, 3 segments require 6 points. Press the Add Point key four times to add four more points.
|
|
4.
|
Press Next Point Left until the highlighted red point is the first point to the left. Press Point Value and enter 0 dB.
|
|
5.
|
Press Next Point Right and set the Point Value to 0 dB for the second point from the left. Press Point Freq and enter 1830 MHz.
|
|
6.
|
Press Next Point Right and set the Point Value to 13.5 dB for the third point from the left. Press Point Freq and enter 1830 MHz.
|
|
7.
|
Press Next Point Right and set the Point Value to 13.5 dB for the fourth point from the left. Press Point Freq and enter 1870 MHz.
|
|
8.
|
Press Next Point Right and set the Point Value to 0 dB for the fifth point from the left. Press Point Freq and enter 1870 MHz.
|
|
9.
|
Press Next Point Right and set the Point Value to 0 dB for the sixth point from the left. Press Point Freq and enter 1900 MHz.
|
 |