 |
|
 2- 2- |
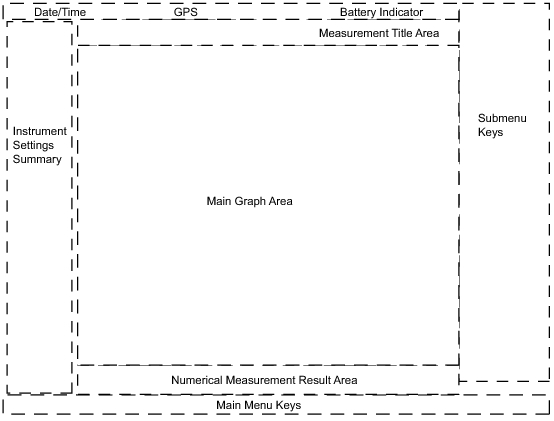
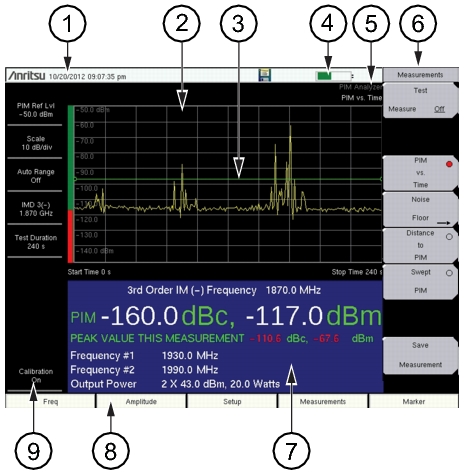
1. | Real Time Clock (followed by GPS Coordinates if Option 31 is installed) |
2. | Main Graph Area or Sweep Window or Measurement Grid |
3. | Limit Line (Green line, set from Limit menu)) |
4. | Battery Status Icon |
5. | Instrument Mode and Measurement Title |
6. | Submenu Keys or Active Function Block |
7. | PIM Summary Table |
8. | Main Menu Keys |
9. | Instrument Settings Summary |
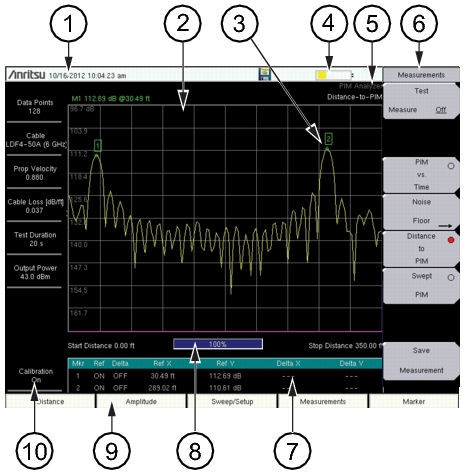 |
1. | Real Time Clock (followed by GPS Coordinates if Option 31 is installed) |
2. | Main Graph Area or Sweep Window or Measurement Grid |
3. | Marker on Distance‑to‑PIM Measurement Trace |
4. | Battery Status Icon |
5. | Instrument Mode and Measurement Title |
6. | Submenu Keys or Active Function Block |
7. | Marker Table |
8. | Progress Indicator |
9. | Main Menu Keys |
10. | Instrument Settings Summary |
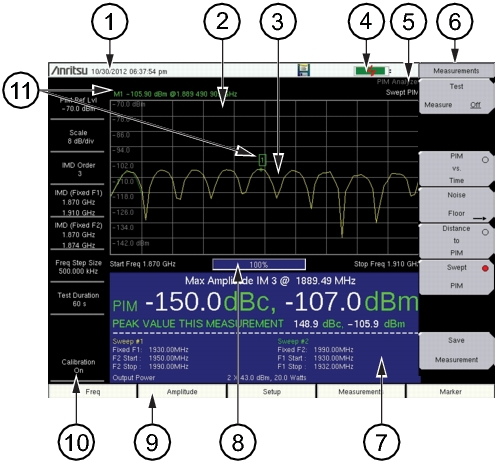 |
1. | Real Time Clock (followed by GPS Coordinates if Option 31 is installed) |
2. | Main Graph Area or Sweep Window or Measurement Grid |
3. | Swept PIM Measurement Trace (green trace and yellow trace – see footnote)1 |
4. | Battery Status Icon |
5. | Instrument Mode and Measurement Title |
6. | Submenu Keys or Active Function Block |
7. | PIM Summary Table |
8. | Progress Indicator |
9. | Main Menu Keys |
10. | Instrument Settings Summary |
11. | Marker data automatically displayed |