Line Sweep Tools is intuitive for most users. It has the capability to work rapidly with a large number of traces.
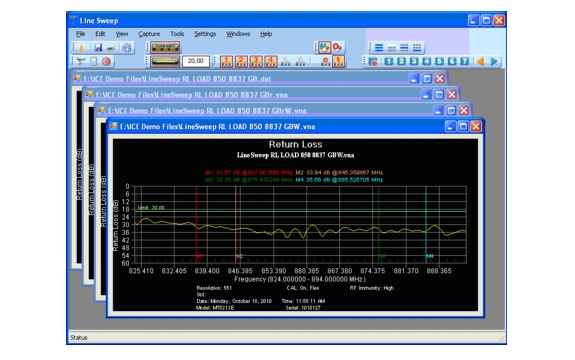
Line Sweep Tools Window
Line Sweep Tools can open DAT files from HHST; or VNA/DAT files from Anritsu’s E-series instruments. It also can open PIM files. Either way, the file once opened, can be inspected and modified in many different ways. Line Sweep Tools saves files as a new type of DAT file, and can export traces as VNA, text, JPG, BMP, or PNG.
Markers and Limit Lines
The easiest way to manage markers is to turn one on and use the mouse to drag it to the desired position. The marker tool bar is shown in Figure: Limit Toolbar and Marker Toolbar. Marker number 1 is On in the figure below. Markers can be set to an exact value by pressing the “e” button, which displays detailed marker controls, numeric value entry, peak find, and valley find.
Limit Toolbar and Marker Toolbar
The dark button on the left turns on the limit line. Once on, it can be dragged to the desired place, or put on an exact y-axis value by entering a number.
Marker Presets
The fastest way to manage markers on multiple traces is to use the preset function. The marker and limit line preset toolbar allows users to quickly set all markers and the limit line to pre-defined values on similar traces (Figure: Preset Toolbar).
Preset Toolbar
First set the markers and limit lines on a typical trace to the desired values. Then, press the red “e” or edit button on the Preset toolbar. This puts the preset buttons into “learn” mode. Now, press a preset button (1 to 7). This programs the preset button where to put the markers and limit lines. Finally, press the red “e” button again to exit the learn mode.
The programmed button is now enabled. Line Sweep Tools can program up to 7 buttons with preset markers and limit line.
To use the preset, just press it and the markers and limit line will display at the programmed locations even when switching to a new trace. The two arrow keys make going to the next, or previous, trace simple. Using presets, a dozen similar traces can be reliably validated in seconds.
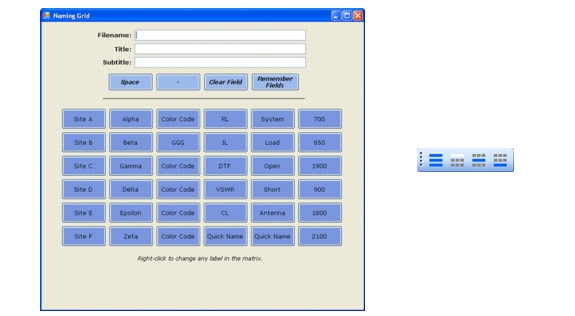
Renaming Grid
The renaming grid, much like the naming grid in the E series instruments, allows users to quickly and consistently rename filenames, trace titles, and trace subtitles. The grid can be set up with custom phrases to make the renaming process simpler.
Renaming Grid and Renaming Toolbar
To use the renaming grid:
1. Click on the left icon of the Renaming toolbar.
2. Select the filename, title, or subtitle box. Right-clicking on a box will allow you to change the text on the button.
3. Press buttons and type until the desired name is shown.
4. Press Remember Fields to copy the new name for later use.
5. On the toolbar, press the button that corresponds to the field to be renamed.
6. If desired, use the arrow keys on the Marker toolbar to go to the next trace.
Report Generator
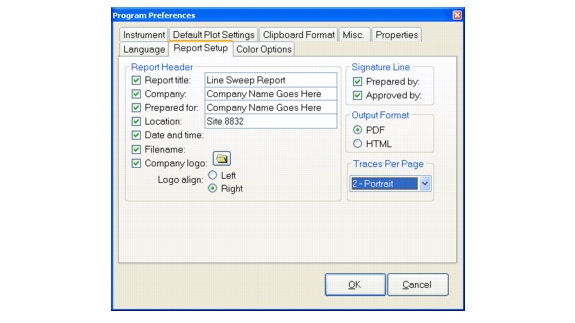
To use the report generator in Line Sweep Tools, go to File menu and select Report Setup to tell Line Sweep Tools how you want the report to appear. In this case, the report will have the name of the contractor that did the work (Company field), the contractor logo, and will be generated in PDF format (Figure: Report Setup Tab).
Report Setup Tab
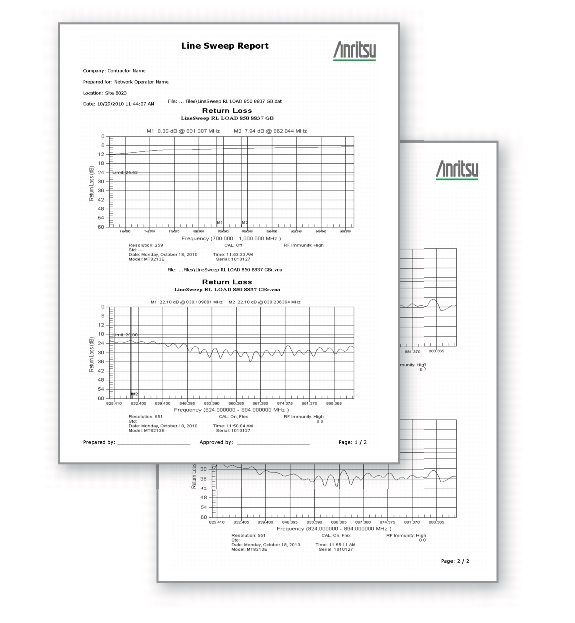
Once the report generator is setup, File > Generate Report, will create the PDF. The report will include all traces that were open at the time the report was made (Figure: Generated Report).