Pressing the Marker main menu key will bring up the Marker menu. Markers can be applied to active or recalled measurements. The instrument supports six reference and six delta markers. Markers can be stored in the setups and recalled with the setup file at a later time.
Select, Activate, and Place a Marker / Delta Marker
1. Press the Marker main menu key.
2. Press the Marker 1 2 3 4 5 6 key to select Marker number 1. The underlined number indicates the active marker.
3. Use the arrow keys, the keypad, or the rotary knob to move the marker. The current value for the selected marker is shown above the upper-left corner of the graph. It is also possible to drag the marker using the touch screen.
4. The Delta Markers are available for each of the six reference markers. For the selected marker, Toggle Delta On/Off to turn on the Delta marker. The Delta marker’s reference is set as the current marker position when the delta marker is enabled.
Selecting Markers
Marker To Peak and Marker To Valley
All the cable and antenna measurements include Marker To Peak and Marker To Valley selections that sets the peak and valley markers automatically.
1. Press the Marker main menu key and select a marker.
2. Toggle the On/Off key to activate the marker.
3. Press Marker To Peak to set the marker to the peak of the measurement.
4. Press Marker To Valley to set the marker to valley of the measurement.
Peak/Valley Auto
When making Return Loss and VSWR measurements, the Peak / Valley Auto feature can be used to automatically turn on Marker 1 to peak, Marker 2 to valley, and display M1 & M2 in the Marker Table. This feature is not available for DTF measurements.
1. Press the Marker main menu key.
2. Press the Peak/Valley Auto key.
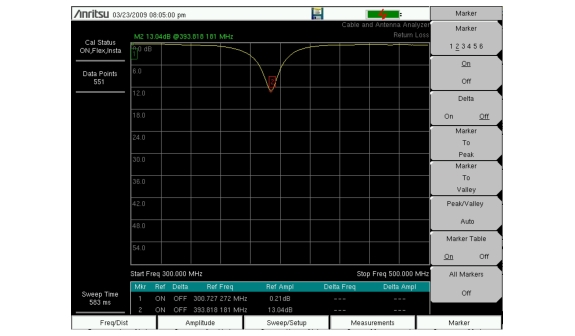
Using Peak/Valley Auto to Place M1 & M2 on Peak/Valley
Marker Table
The Marker table allows for viewing of up to six reference markers and six delta markers.
1. Press the Marker main menu key.
2. Press the Marker Table On/Off submenu key.
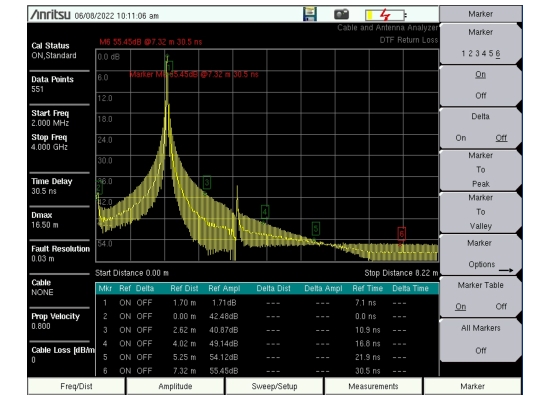
Marker Table Displays Six Markers
Peak Between M1 & M2 and Valley Between M1 & M2
When Marker 5 is selected, pressing the Marker Option key will bring up two more peak options. Peak Between M1 & M2 and Valley between M1 & M2 are displayed.
1. Press the Marker main menu key.
2. Select Marker & 5.
3. Press Marker Options and select Peak between M1 & M2 or Valley Between M1 & M2.
Peak Between M3 & M4 and Valley Between M3 & M4
When Marker 6 is selected, pressing the Marker Option key will bring up two more peak options. Peak Between M3 & M4 and Valley between M3 & M4 are displayed.
1. Press the Marker main menu key.
2. Select Marker & 6.
3. Press Marker Options and select Peak Between M3 & M4 or Valley Between M3 & M4.