Duplexer Measurement
The procedure below describes how to use the instrument to measure a duplexer.
1. Press the Menu or Mode key and select Transmission Measurement.
2. Press the Freq main menu key and set the start and stop frequencies
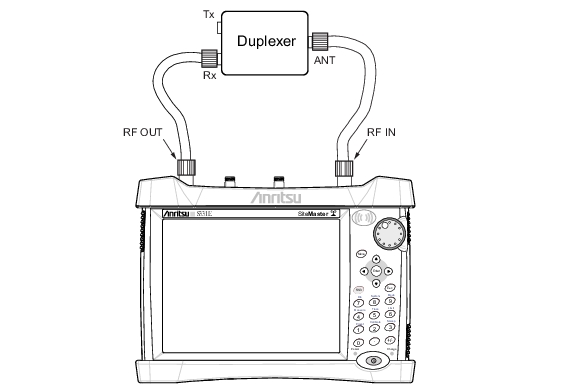
3. Connect a cable to RF Out and a cable to RF In.
4. Open the Calibration Menu, Shift then Calibration (2) key.
5. Verify that Power Level is set to High.
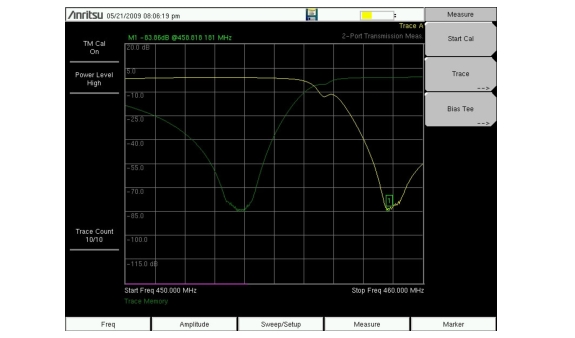
6. Press the Start Cal submenu key and follow instructions on the display.
After the calibration is complete, the status display message in the upper left will display “TM Cal On”.
The trace should be flat at the 0 dB reference line and ready for measurements.
7. Connect the cable connected to RF Out of the instrument to the Rx port of the Duplexer.
8. Connect the cable connected to RF In to the ANT port of the duplexer.
9. Open the Trace main menu Shift then Trace (5) and press Copy Trace To Display Memory.
10. Disconnect the cable from the Rx port and connect it to the Tx port of the duplexer