 | EMF On Off Turns EMF Measurement on and off. Refer to Electromagnetic Field (EMF) Measurements Option 444 Measurement Guide, 10580-00455. Back Returns to the Power and BW Menu. |
| EMF On Off Back |
 | Emission Mask (In-Band) Opens the Emission Mask (In-Band) Menu. Spurious Emissions (Out-of-Band) Opens the Spurious Emissions (Out-of-Band) Menu. C/I : Opens the C/I Menu. Back : Returns to the Measure Menu. |
 | This submenu controls the setup and display of the emission mask. The emission mask is a segmented upper limit line that displays frequency range, peak power and frequency, relative power, and pass/fail status for each segment of the mask. The emission mask must have at least two segments. Refer to Emission Mask (In-Band) for more information. Emission Mask On/Off Turns On/Off the Emission Mask graph and table display. Before turning Emission Mask on, you must have created or recalled a mask. With Emission Mask On, the Mask/Limit Line is adjusted up or down based on the selected Ref Power for every sweep. If the Ref Power is set to 'Peak', the center segment of the Mask/Limit is moved to match the peak amplitude of the current trace. If 'Channel' is selected, the center segment of the Mask/Limit is moved to match the calculated channel power contained in the current trace. Recall Limit as Emission Mask Opens the recall menu for selecting a limit line for use as the Emission Mask. Ref Power Peak/Channel Press this submenu key to toggle between the Peak and Channel settings. When Peak is selected, the mask is moved up or down so that the mask value at the center frequency is the same as the peak value of the trace. When Channel is selected, the reference power value is the same as would be calculated by the Channel Power measurement, over the defined channel width; in this case, the mask value at the center frequency is moved to the channel power measurement result. Channel Width Channel Width is preset within the Signal Standard. Press this submenu key, then use the directional arrow keys, rotary knob, or numeric keypad to adjust the channel width as desired. Peak Markers On/Off Turning on this feature displays a peak marker within an Emission Mask segment. For example, if the Emission Mask had seven segments then there would be seven peak markers. Back Returns to the Masks and C/I Menu. |
 | Spurious Emissions On/Off Turns On/Off the Spurious Emissions measurement. Refer to Spurious Emissions (Out-of-Band) for more information. Sweep Single/Continuous Press this submenu key to select Single sweep mode or to initiate Continuous measurement sweeping of the full mask. Press the key again to stop the continuous measurements. Refer to Spurious Emissions (Out-of-Band) Measurements. Sweep Once Press this submenu key to initiate a single sweep of the currently active segment (highlighted in yellow in the Spurious Emission table). The sweep mode must be set to Single. Sweep All Initiates a single measurement sweep of all segments in the mask. The sweep mode must set to Single. Segment Setup Press this submenu key to access the Spurious Segments submenu. See Figure: Spurious Segments Submenu. This key is active only when Spurious Emissions is On. Auto Save Off/On/Full Selects the mask data Auto Save process. When set to On, an HTML file is saved with each segment’s setup and pass/fail results. Auto Save Full saves two file types, HTML and JPG. The HTML file contains setup information, pass/fail results and trace data for all segments in the mask, as well as the screen captures in the associated JPG files. The JPG files are picture files of the measurements associated with each segment. Both the On and Full selections also contain an overall pass/fail status for the mask. Refer to Auto Save Modes. Clear Status Press this submenu key to clear the Peak and Status data in the Spurious Emission table and all of the supported data in the mask data file. Back Returns to the Masks and C/I Menu. |
 | For more information on creating and editing mask segments, refer to Spurious Emissions (Out-of-Band). Spurious Segment Press this submenu key to select the number of a segment to be edited or swept. The key is active only when the segment number is highlighted in red. Use the directional arrow keys, rotary knob, or numeric keypad to enter the desired number. Save Current Settings to Selected Segment Press this submenu key to save the data in the display and all of the supported data for the selected spurious segment in the Spurious Emission table. See Figure: Spurious Emission Measurements. Add Current Settings As New Segment Creates a new segment with the current parameter set. The new segment is appended to the end of the list in the Spurious Emission table. Delete Current Segment Deletes the current segment from the Spurious Emission table. Segment Start Amplitude Press this submenu key to set a value for the segment’s start limit amplitude. When the value is highlighted in red, use the directional arrow keys, rotary knob, or numeric keypad to enter the amplitude value. Segment Stop Amplitude Press this submenu key to set a value for the segment’s stop limit amplitude. When the value is highlighted in red, use the directional arrow keys, rotary knob, or numeric keypad to enter the amplitude value. Save Mask Saves the mask data from the display and Spurious Emission table and all supporting mask data into the mask data file. Back Returns to the previous menu. |
 | On/Off Center Freq Span Carrier Signal Type Sweep Time Back Offset Center Freq |
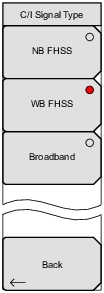 | NB FHSS WB FHSS Broadband Back |
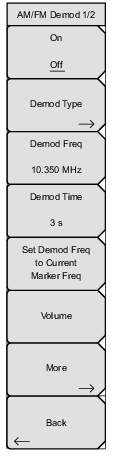 | On/Off Demod Type Demod Freq Demod Time Set Demod Freq to Current Marker Freq Volume More Back |
 | Press one of these submenu keys to select an AM/FM demodulation type. The red circle indicates the active selection. FM Wide Band Frequency Modulation FM Narrow Band Frequency Modulation AM Amplitude Modulation USB Upper Sideband. This can also be used when demodulating CW (Morse code) signals. LSB Lower Sideband. This can also be used when demodulating CW (Morse code) signals. Back Returns to the AM/FM Demod 1/2 Menu. |
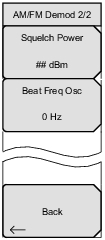 | Squelch Power Beat Freq Osc Back |
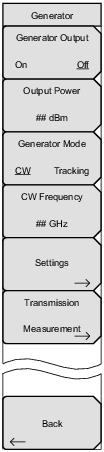 | Generator Output On Off Back |