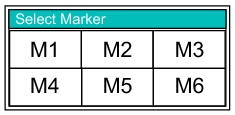
 | Marker Press this submenu key to select which marker (1, 2, 3, 4, 5, 6) is desired to be active. The underlined marker number is the active marker. See Figure: Marker Selection Box. On/Off Press this submenu key to turn On or Off the selected (underlined) marker in the Marker submenu key. Delta On Off Press this submenu key to turn on a delta marker and to prompt for a delta offset frequency, either positive or negative from the frequency of the currently active marker. Marker to Peak Press this submenu key to place the currently active marker on the highest signal amplitude that is currently displayed on screen. Marker to Valley Press this submenu key to place the currently active marker on the lowest signal amplitude that is currently displayed on screen. Swap Marker Trace Press this submenu key to move markers from one trace to another (when Trace Overlay is On). See Figure: Trace Menu – Distance‑to‑PIM. Marker Table On Large Off Press this submenu key to toggle the marker table On, Off, or on and Large. The Large marker display shows only the x‑axis and y‑axis values of the active marker. All Markers Off Turns off all displayed markers. |


