When multiple channels are displayed, use the Channel Maximum button to maximize the active channel to fill the display area. Clicking a second time returns to the prior multi-channel view.
Chan. Next
When multiple channels are displayed, the Channel Next button activates the next higher channel number. When the highest channel number is reached, the next click activates channel 1 (one).
Chan. Previous
When multiple channels are displayed, the Channel Previous button activates the next lower channel number. When channel 1 (one) is reached, the next click activates the highest channel number.
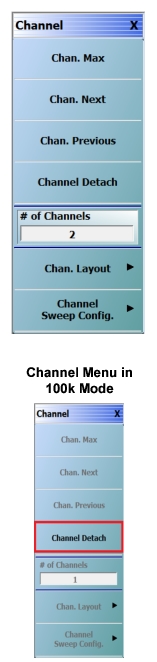
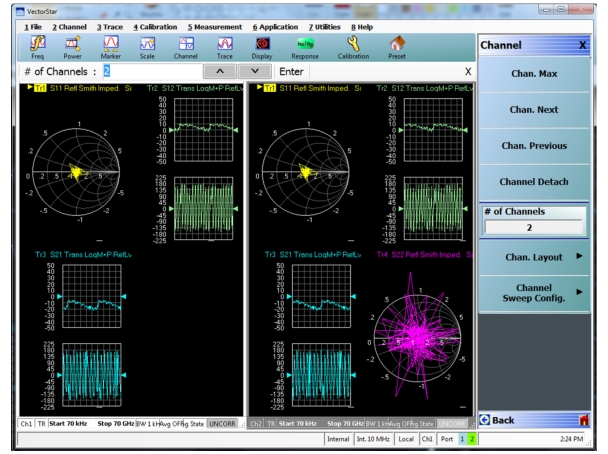
Select displays the Number of Channels field toolbar. The toolbar allows the user to set the number of displayed channels in discrete values of 1 (one), 2, 3, 4, 6, 8, 9, 10, 12, or 16 channels. If other channel settings are applied (5, 7, 11, 13, or 14), the instrument applies the next permitted channel setting. The Channel Layout (described below) is automatically set to the number of selected channels. If the instrument is in 100,000 point mode, only 1 (one) channel is available.
Chan. Layout
The Channel Layout button displays the CHAN. LAYOUT menu which defines how multiple channels are displayed on the screen.
• Changes made in Ch1 and Ch2 from the main application will affect the respective Detached Windows.
100k Mode
• In 100k mode the user can create a maximum number of 16 detached windows for a single channel.
• The user can monitor the different traces in different detached windows.
• In Channel menu, when in 100k mode, only the menu item Channel Detach will be enabled.
Notes
• The message: "Maximum number of supported detach windows is 16." is displayed when user tries to detach a window when 16 detached windows are already running.
• In the case of an "Out of Memory" scenario, an error message is displayed to the user: “Unable to add additional windows due to memory limits.”
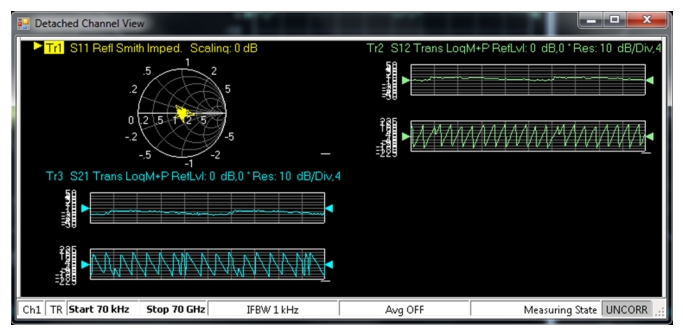
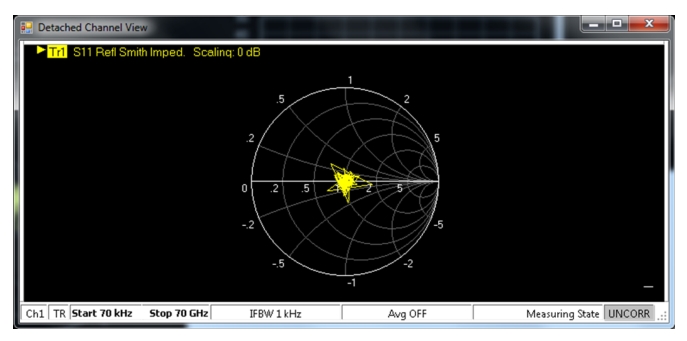
Channel 1 Detached
Detached Channel View – Channel 1 in Detached Window 1
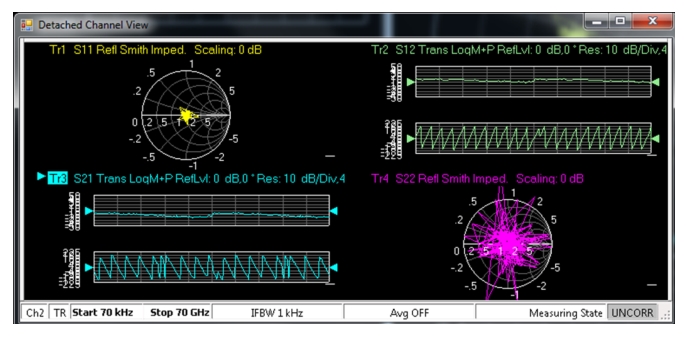
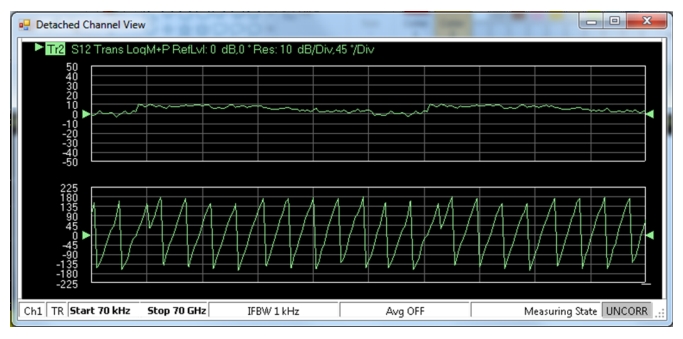
Channel 2 Detached
Detached Channel View – Channel 2 in Detached Window 2
Detached Channel View – Trace 1 of Channel 1 in Detached Window 1
Detached Channel View – Trace 2 of Channel 1 in Detached Window 2
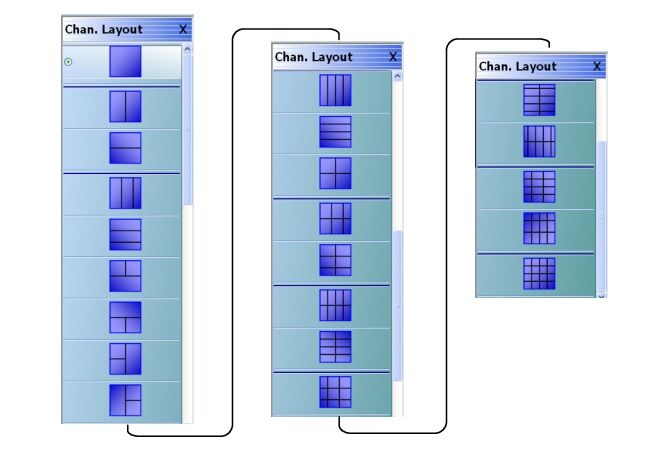
CHAN. LAYOUT Menu
The CHANNEL LAYOUT menu allows the user to select from 22 available channel views. The channel view buttons are not labeled, but instead provide a representative icon of each view configuration. For example, the Single Channel View button provides a channel view where one channel is displayed in one display area. Once the desired view is selected, click the Back button at the bottom of the CHAN. LAYOUT menu to return to the CHANNEL menu. Note that CHAN. LAYOUT menu setting and the # of Channels setting on the CHANNEL menu are linked. Changing the number of channels selects an appropriate channel layout. Changing the channel layout where the number of displayed channels changes, changes the number of channels set on the CHANNEL menu.
The Chan. Layout buttons do not have labels, but do have tool tips that appear if the mouse pointer is hovered over the button. The selected channel layout view is indicated by the button selected icon. For VNA programmatic control, note also that each channel layout is described by the appropriate SCPI parameter. For example, to program a three across channel layout, use the R1C3 parameter.
The long CHAN LAYOUT menu is immediately below. The names of the different channel layout displays are shown in the Table: Channel Layout Options (1 of 2) below.
CHAN. LAYOUT (CHANNEL LAYOUT) Menu
The table below describes each Channel Layout option.
Channel Layout Options (1 of 2)
Graphic
Description
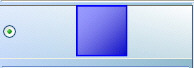
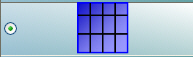
Single Channel View
Click Back to return to the CHANNEL menu.
R1C1 for SCPI programs.
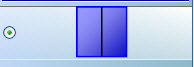
Two Channel View – 2 Across x 1 Down
Click Back to return to the CHANNEL menu.
R1C2 for SCPI programs.
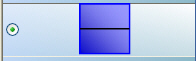
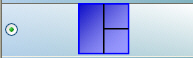
Two Channel View – 1 Across x 2 Down
Click Back to return to the CHANNEL menu.
R2C1 for SCPI programs.
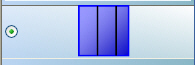
Three Channel View – 3 Across
Click Back to return to the CHANNEL menu.
R1C3 for SCPI programs.
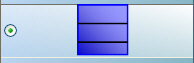
Three Channel View – 3 Down
Click Back to return to the CHANNEL menu.
R3C1 for SCPI programs.
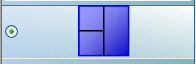
Three Channel View – 2 on Top x 1 on Bottom
Click Back to return to the CHANNEL menu.
R2C2C1 for SCPI programs.
Three Channel View – 1 on Top x 2 on Bottom
Click Back to return to the CHANNEL menu.
R2C1C2 for SCPI programs.
Three Channel View – 2 on Left x 1 on Right
Click Back to return to the CHANNEL menu.
C2R2R1 for SCPI programs.
Three Channel View – 1 on Left x 2 on Right
Click Back to return to the CHANNEL menu.
C2R1R2 for SCPI programs.
Four Channel View – 4 Across
Click Back to return to the CHANNEL menu.
R1C4 for SCPI programs.
Four Channel View – 4 Down
Click Back to return to the CHANNEL menu.
R4C1 for SCPI programs.
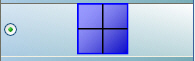
Four Channel View – 2 Across x 2 Down
Click Back to return to the CHANNEL menu.
R2C2 for SCPI programs.
Six Channel View – 3 Across x 2 Down
Click Back to return to the CHANNEL menu.
R2C3 for SCPI programs.
Six Channel View – 2 Across x 3 Down
Click Back to return to the CHANNEL menu.
R3C2 for SCPI programs.
Eight Channel View – 4 Across x 2 Down
Click Back to return to the CHANNEL menu.
R2C4 for SCPI programs.
Eight Channel View – 2 Across x 4 Down
Click Back to return to the CHANNEL menu.
R4C2 for SCPI programs.
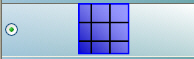
Nine Channel View – 3 Across x 3 Down
Click Back to return to the CHANNEL menu.
R3C3 for SCPI programs.
Ten Channel View – 5 Across x 2 Down
Click Back to return to the CHANNEL menu.
R5C2 for SCPI programs.
Ten Channel View – 2 Across x 5 Down
Click Back to return to the CHANNEL menu.
R2C5 for SCPI programs.
Twelve Channel View – 3 Across x 4 Down
Click Back to return to the CHANNEL menu.
R4C3 for SCPI programs.
Twelve Channel View – 4 Across x 3 Down
Click Back to return to the CHANNEL menu.
R3C4 for SCPI programs.
Sixteen Channel View – 4 Across x 4 Down
Click Back to return to the CHANNEL menu.
R4C4 for SCPI programs.
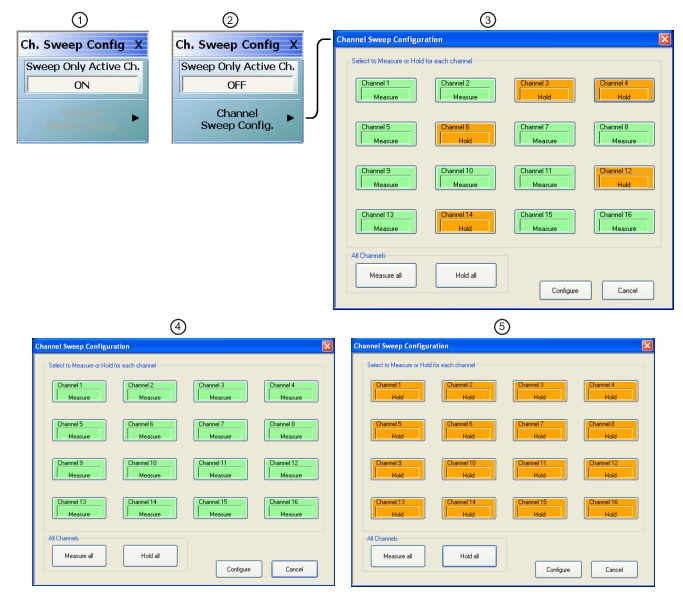
CHANNEL SWEEP CONFIG Menu
The CHANNEL SWEEP CONFIG menu allows the user to configure the sweep settings for each channel.
Channel Sweep Configuration Menu and Dialog (1 of 2)
1. Channel Sweep Config Menu – Sweep only active channel toggled to ON – In this mode:
• Only the active channel will be sweeping and all the other channels will be put on HOLD.
• If the user changes the active channel, the new channel that has become active will sweep and all other channels will be put on HOLD.
• User will not be able to start sweep (via remote) for any of the inactive channels.
• User will be able to perform “All channel” operations such as “Hold all channels”, “Continue all channels”, “Restart all channels” and “Single Sweep & Hold all channels”.
• In this mode, the Channel Sweep Config. button is disabled.
2. Channel Sweep Config Menu – Sweep only active channel toggled to OFF – In this mode:
• The Channel Sweep Config. button is active. Clicking on this button opens the Channel Sweep Configuration dialog.
3. Channel Sweep Configuration dialog allowing user selected channels set to either Measure or Hold.
4. Channel Sweep Configuration dialog showing channels set to Measure all.
5. Channel Sweep Configuration dialog showing channels set to Hold all.