Marker Setup Select (1–8) M# Press to turn on a marker (1 to 8) and selects which marker is active (green half circle). Current active marker is displayed on the button (M1). Edit Press to change the position of the active marker using the Up/Down Arrow keys, rotary knob or the keypad. Type Sets the current active marker as a reference (standard) marker or a delta marker to Marker 1. Marker 1 is always a reference marker. M# (On Off) Toggles the display of the active marker on or off. When off the location of the marker is stored. Display (Mkr + Table, Mkr Only, Off) Press to open display options. Mkr+Table: Displays both the markers that are on and marker table. Mkr Only: Displays markers that are on, hides the marker table. Off: Hides all markers and the marker table. Marker Preset Turns off all markers except for Marker 1. Sets Marker 1 location to the middle of the sweep. |
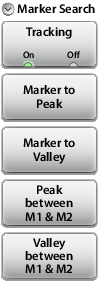
Marker Search Tracking (On Off) When turned On, the active marker becomes a tracking marker and defaults to tracking the peak. To track Valleys, press the Marker to Valley button after turning on Tracking. The Search settings can all be applied to a Marker with Tracking either On or Off. Marker to Peak Places the currently active marker on the highest signal amplitude currently displayed on screen. Marker to Valley Places the currently active marker on the lowest signal amplitude currently displayed on screen. Markers 5, 6, 7, and 8 can perform a special Marker search to find the Peak or Valley between two other markers. When Marker 5 or Marker 7 is Active: Peak Between M1 & M2: Places Marker 5 or 7 on the highest signal amplitude between Marker 1 and Marker 2. Valley Between M1 & M2: Places Marker 5 or 7 on the lowest signal amplitude between Marker 1 and Marker 2. When Marker 6 or Marker 8 is Active: Peak Between M3 & M4: Places Marker 6 or 8 on the highest signal amplitude between Marker 3 and Marker 4. Valley Between M3 & M4: Places Marker 6 or 8 on the lowest signal amplitude between Marker 3 and Marker 4. |