The Record panel contain the buttons for taking a snapshot or measurement of the signal displayed (Figure: Record Panel).
Record Panel
Not all modes support recorded measurements or snapshots being stored into the database. If the mode is gray the record measurement feature is not active.
Record Functions per Mode
Mode
Snapshot
Measurement
Spectrum
yes
yes
Spectrogram
yes
yes
Spectrum Density
yes
no
Mask
yes
no
Satellite (471)
yes
no
TETRA (464)
yes
no
Channel Scanner (476)
yes
no
Signal ID Basic (472)
yes
no
Signal ID Advanced (473)
yes
no
Power Monitoring (474)
yes
yes
Snapshots
Snapshots can be divided into two different types:
• Stored into the database.
• Stored as image or CSV file.
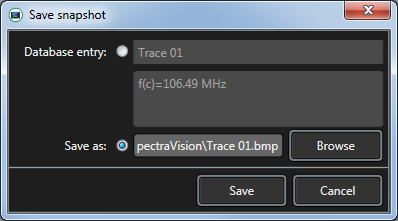
By clicking the Snapshot button in the “Record” section of the device ribbon the resulting view looks like Figure: Save Snapshot View.
Save Snapshot View
You can store the snapshot into the SpectraVision database. This snapshot can be reviewed at a later time. See the Review Records section below for information on viewing snapshots and recorded (video) measurements within the SpectraVision application.
You can also save the current snapshot on to your laptop/PC by selecting the Save As radio button and entering the location where the file is to be saved.
Snapshots can be saved in the following formats - BMP, CSV, GIF, JPG, and PNG.
Snapshot Save Location
Mode
SpectraVision Database
Save as: Local PC
Spectrum
yes
yes
Spectrogram
yes
yes
Spectrum Density
no
yes
Mask
no
yes
Satellite (471)
no
yes
TETRA (464)
no
yes
Channel Scanner (476)
no
yes
Signal ID Basic (472)
no
yes
Signal ID Advanced (473)
no
yes
Power Monitoring (474)
no
yes
Recorded Measurements
Recorded measurements are video files that are stored either in the SpectraVision database or on your PC/laptop. Once recorded, the video can play within the SpectraVision application with functions such as start, stop, fast forward, fast reverse, pause and run.
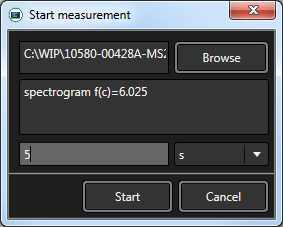
If the measurement feature is enabled for the current mode, you can click on Measurements to open the corresponding window as shown in Figure: Start Measurement Window.
Start Measurement Window
First, click in the Browse button and select the location and filename for the measurement file. If you want to enter a comment as well, you can do so in the comments section. Afterwards, enter the duration of the measurement. This is actually only an approximate value, because the duration of one measurement depends on the network connection speed between the device and the software. The round trip time is the time from receiving one sweep to the next sweep. As already mentioned, this time can vary. The interval is calculated by the round trip time and the sweep count entered above.
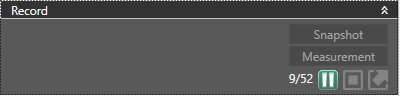
By clicking Start the measurement starts and the data is gathered and stored. To control the current measurement, the “Record” section will now look like Figure: Active Record Measurement Panel.
Active Record Measurement Panel
While the recording is running, you cannot use the “Snapshot” and “Measurement” feature. The currently gathered data chunks are shown in white as 9/52 in Figure: Active Record Measurement Panel. In this instance, once the counter reaches 52 the measurement is complete.”Additionally, you can pause and continue the current recording.
Review Records
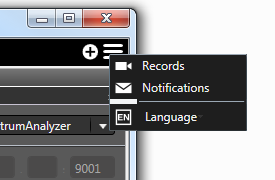
After running a measurement or taking a snapshot, every record can be viewed by clicking on the three pull down list bars in the top right corner of the SpectraVision window and then clicking on Records. The pull down list shown in Figure: View Records in the Record Pane.
View Records in the Record Pane
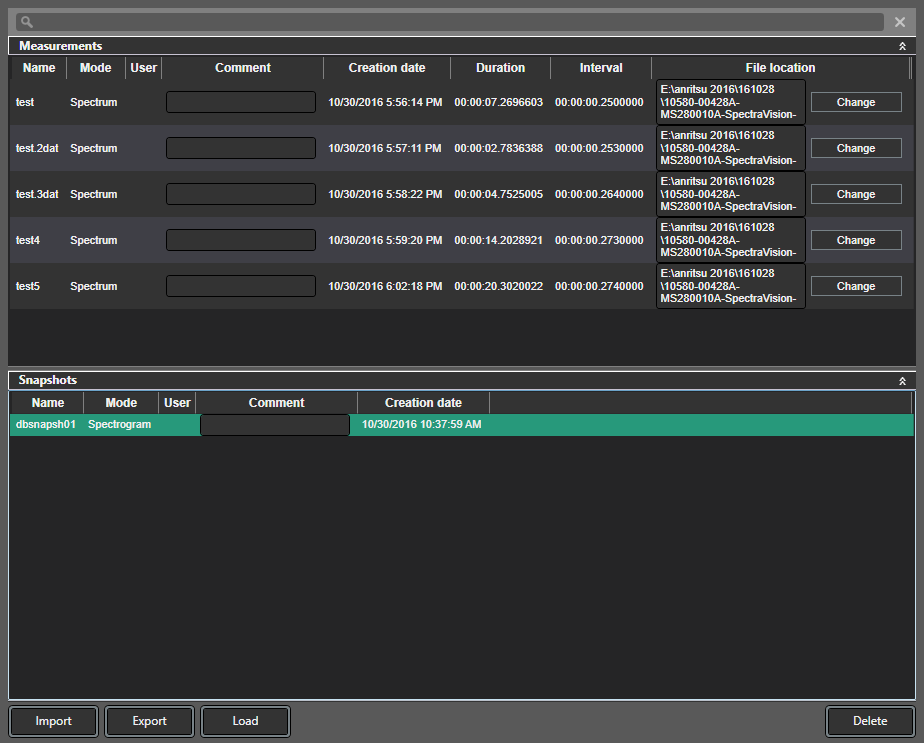
Once Records is selected in the pull-down list. The Records window for Measurements and Snapshots is displayed in Figure: Records Window.
Records Window
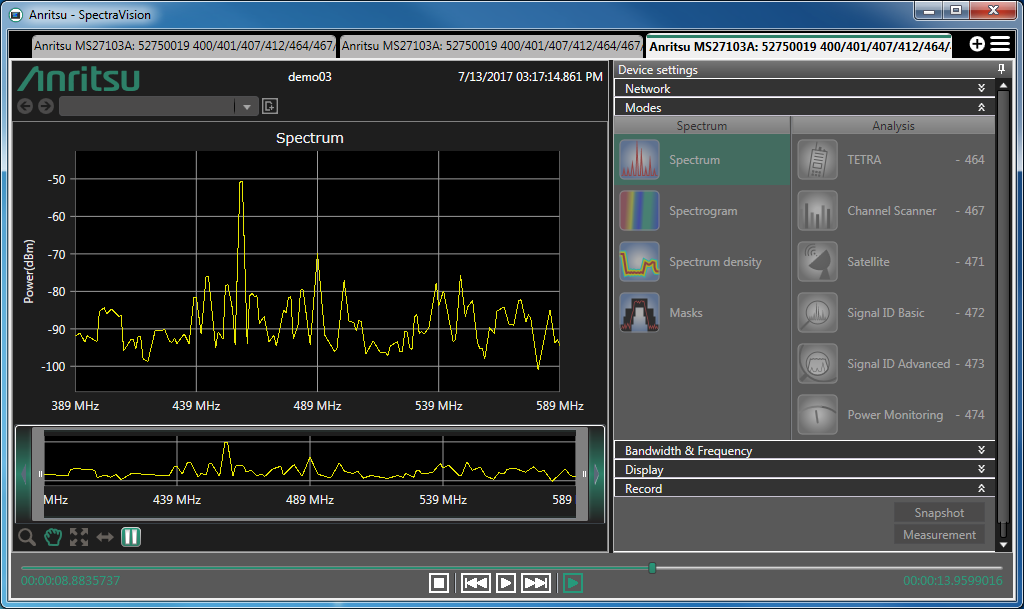
If you want to play a measurement, double click the item in the list or select the item and click “Load”. The selected recording opens in another measurement window with the name of the recording on the title bar. The corresponding mode and a replay bar at the bottom of the view shows up (Figure: Recording Replay Display). It is possible to play the entire measurement or jump to specific positions by modifying the replay slider. The device tab title will include the word “Offline”. Device settings are generally disabled for “Offline” devices. Possible user interactions include adding markers, moving the spectrum mode specific zoom window or activating minimum or maximum hold.
Recording Replay Display
The same procedure is done to view snapshots. The only difference here is that there is no replay possible. Every other user interaction can be done as well.