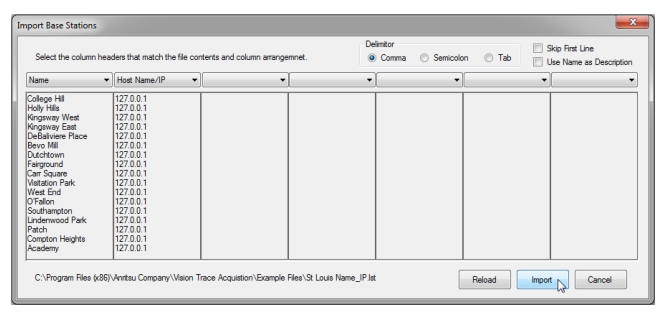
You will now see the Import Base Stations dialog (Figure: Import Base Stations Dialog – Example 1). This dialog lets you specify what each field in the import file corresponds to in the Monitor list. The file we have selected has just two columns, Name and IP address. This is enough to create a database. The import dialog will try to determine the field separator (comma, semicolon or tab) and make a best guess at the fields the file contains. It will not always be right, so you can use the drop-down lists above each column to specify the role that column of data is to have in the database.
Import Base Stations Dialog – Example 1
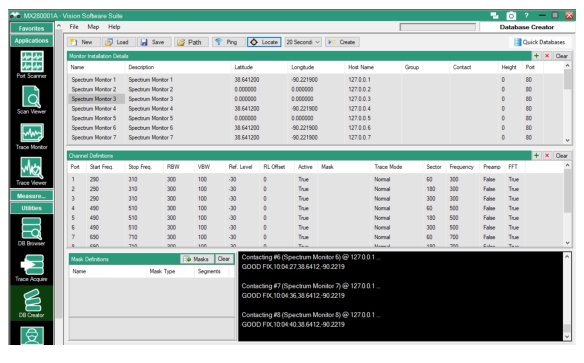
10. Click Import and the input tables in Database Creator will automatically compile. This import file did not contain GPS coordinates for the monitors, and click Locate (Figure: Create Database Dialog – Imported Monitor List – Example 1) to get that from the monitors. If Vision Monitor Simulator is running, you can do that now to complete the Monitor Definition table.
Create Database Dialog – Imported Monitor List – Example 1