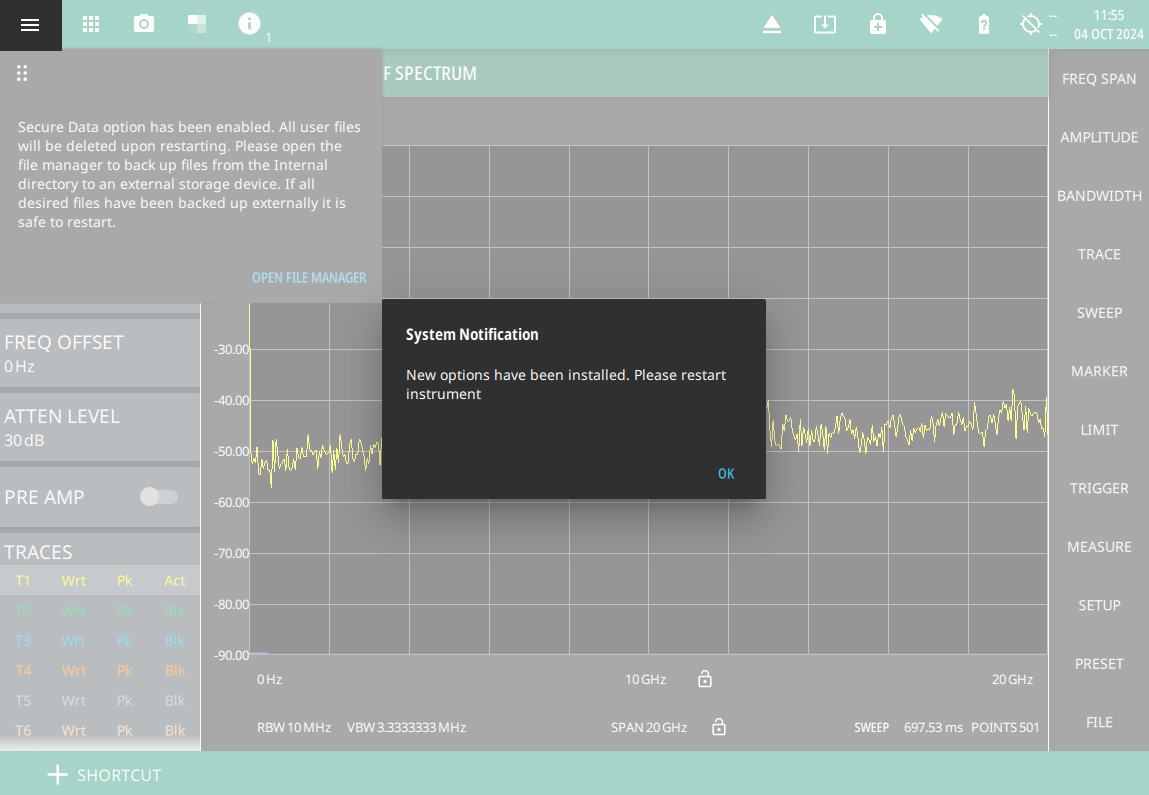
The user will be notified with the following messages after the Secure Data Option 7 is installed in your instrument:
1. Touch OK button to close the System Notification dialog.
2. Touch OPEN FILE MANAGER to save the files stored in the instrument’s internal directory to an external USB memory device.
System Notification Dialog
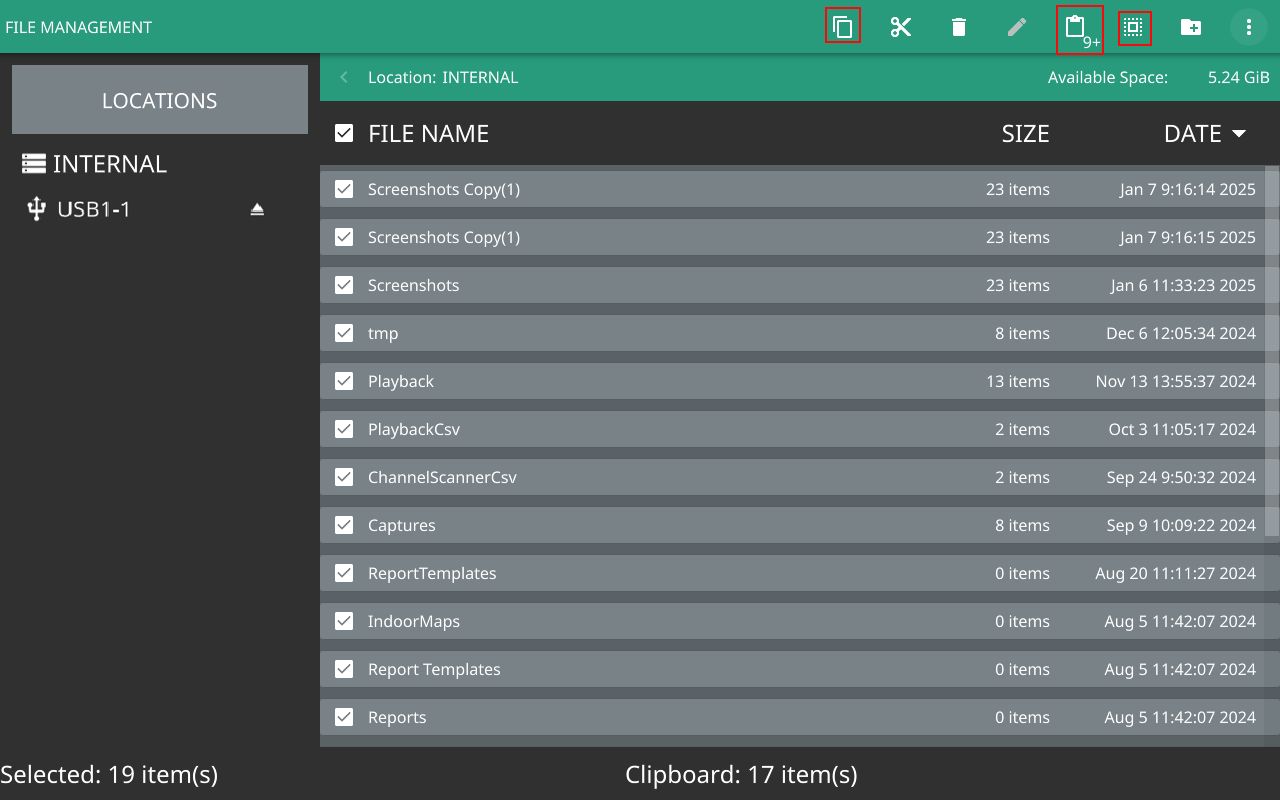
3. Connect an external USB memory device to any one of the USB ports of the instrument.
4. Press SELECT icon located on the top right side of the file manger to select all the internal files.
5. Press COPY icon and select USB1-1 directory and press PASTE icon to save all the files on the external memory device.
File Manager
6. Go to System Menu > SYSTEM POWER > CONTINUE TO REBOOT> RESTART INSTRUMENT to finish rebooting the unit to complete enabling the Option 7.
Secure Data - Backup Files Dialog
Turning On Secure Display
To enable instrument’s measurement data blanking go to System menu (3-line icon) > Settings > Advanced > Secure Display. Turn on the Secure Display toggle to hide the displayed frequency/amplitude/bandwidth values. Frequency values displayed on the screen and menus are replaced with ##.#### symbols as shown in Figure: Secure Display On - Frequency Blanking.
Secure Display On - Frequency Blanking
The Secure Display toggle is turned off by default. After Secure Display is enabled the instrument user is notable to restore the frequency readouts. Option 7 is designed to ensure that user files and calibration files cannot be stored in the internal memory of the instrument.
Warning
Note that when Frequency Blanking is turned on, user files can still be stored and saved to an external USB drive, and that frequency information is not blanked in those files. Also, frequency information is not blanked from the SCPI commands that are used to remotely control the instrument.