Not all instruments support all of the following user calibration methods for cable and antenna analyzer measurements. Some of the calibration methods are option dependent, please refer to your instrument’s technical data sheet for the list of available options.
OSL (Open-Short-Load)
For all measurement except Transmission (USB Sensor), you can manually calibrate the S331P using an external precision OSL calibration kit. Refer to OSL Calibration for calibration instructions.
The combined calibration method OSL + Trans (USB Sen) allows the instrument to be calibrated once for all the supported measurement methods, eliminating the need to re-calibrate when switching from one type of measurement to another, such as return loss to transmission. Refer to OSL + Transmission (USB Sen) Calibration for the calibration procedure.
OSL + Transmission (2-Port) method involves calibrating the port one with OSL and then calibrating the transmission from port 1 to port 2. The cable used to connect the two ports would be normalized. Refer toOSL + 2-Port Transmission Calibration (Option 21)for the calibration procedure.
The 2-port transmission measurement is used to verify the performance of tower-mounted amplifiers, and duplexers, and to verify antenna isolation between two sectors. The excellent dynamic range makes it suitable for repeaters as well. The second port is a selective receiver which provides up to 100 dB dynamic range which makes it possible to test the band pass filters common on many networks Refer to 2-port Transmission Calibration (Option 21) for the calibration procedure.
Note
OSL + Trans (2-port), OSL + Trans (2-port)
iOSL
The system will automatically switch between open, short and load during the calibration process. Note that this calibration method is only available when InstaCal ICN51A is used. Refer to iOSL Calibration for the calibration procedure.
iOSL + Trans (USB Sen)
The system will automatically switch between and open, short and load. ICN51A InstaCal is used in this method instead of traditional OSL. External USB power senor is necessary to carry out this calibration method. Refer to iOSL + Transmission (USB Sensor) Calibration for the calibration procedure.
iOSL + Trans (2-port) (Option 21)
Just like OSL+ Trans (USB Sen) the iOSL + Trans (2-Port) uses the ICN51A instead of a traditional OSL. The system will automatically switch between and open, short and load. Refer to iOSL + 2-Port Transmission Calibration (Option 21) for the calibration procedure.
Calibration Mode
The available calibration modes are Standard Cal and Flex Cal. Standard Cal applies to the currently set frequency range. Changing either the Start or Stop Frequency setting requires turning off User Cal, in which case the factory default 1-Port ReadyCal will apply to all measurement types except Transmission (USB Sensor). You may subsequently re-calibrate the instrument as appropriate.
Flex Cal calibrates the instrument over the entire frequency range and interpolates data points if the frequency range is changed. This method saves time as it does not require the user to re-calibrate the system for frequency changes. The trade-off is fewer data points and less accuracy when compared to Standard Cal.
Table: Summary of Calibration Types lists the main characteristics of the Standard and Flex calibration types. If you do not expect to change the frequency range often, Standard Cal is recommended for best accuracy.
Summary of Calibration Types
Calibration Mode
Characteristics
Standard Cal
Need to re-calibrate if frequency changes.
This will provide the best accuracy.
Recommended for reporting.
Flex Cal
No need to recalibrate if frequency changes.
Recommended for troubleshooting.
Calibration Status Displays
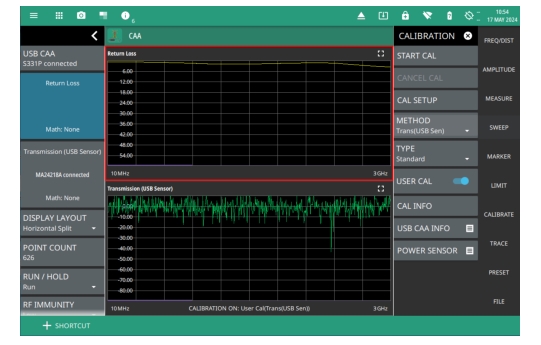
The instrument calibration status and type are displayed below the measurement scale. When User Cal is on, the calibration method is shown in parentheses:
The following status descriptions are representative of the indicators and messages you may see on the interface screen. They are not a complete list of all possible combinations of measurement types and calibration methods. Refer to Calibration Mode.
1-Port ReadyCal ON
USER CAL is off and the factory default 1‑Port ReadyCal is applied to all measurement types except Transmission (Ext Sensor).
CALIBRATION ON: User Cal (RFP1)
The instrument has been calibrated for an OSL measurement (RFP1) and USER CAL is on. The User Cal status indicates the active calibration type is Standard, meaning that frequency adjustments require user calibration to be turned off.
CALIBRATION ON: iUser Cal (RFP1)
The instrument has been calibrated for an OSL measurement (RFP1) and USER CAL is on. The iUser Cal status indicates the active calibration type is Flex, meaning that frequency adjustments are allowed while user calibration is on.
CALIBRATION ON: User Cal (2PES)
The instrument has been calibrated for an OSL + External Transmission measurement (2PES) and USER CAL is on. The User Cal (RFP1) is automatically applied to all other measurement types. The User Cal status indicates the active calibration type is Standard, meaning that frequency adjustments require user calibration to be turned off.
CALIBRATION ON: iUser Cal (2PES)
The instrument has been calibrated for an OSL + Transmission measurement (2PES) and USER CAL is on. The iUser Cal (RFP1) is automatically applied to all other measurement types. The iUser Cal status indicates the active calibration type is Flex, meaning that frequency adjustments are allowed while user calibration is on, except for the transmission measurement.
CALIBRATION OFF
The instrument is set to Transmission (Ext) measurement and has not been calibrated, or USER CAL is off.
Calibration Procedure
You can manually calibrate the instrument or use the ReadyCal factory calibration for quick measurements. The instrument automatically applies the default ReadyCal to all cable and antenna analyzer measurement types
The instrument needs to be manually re-calibrated if a test port cable is used and has been replaced, or when changing frequency in Standard Cal (not in Flex Cal).
To manually calibrate the instrument:
1. Select FREQ/DIST on the main menu and adjust the start and stop frequency values if needed.
If the active calibration type is Standard and USER CAL is on, a warning message is displayed informing you that USER CAL must be turned off. You can use the Flex calibration type to allow frequency changes with USER CAL on.
2. Select CALIBRATION on the main menu and ensure USER CAL is off.
3. Select METHOD and select the desired calibration method for example, OSL or OSL + Trans (USB Sen)).
4. Select TYPE and select either Standard or Flex for the calibration type.
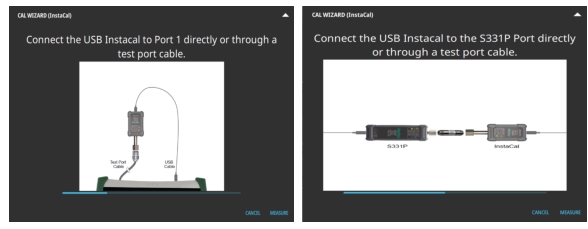
5. Select START CAL. Depending on the selected calibration method, proceed with the appropriate set of instructions for calibration setup shown in the on-screen CAL WIZARD.
OSL Calibration
Follow the steps below to perform OSL calibration method:
1. Select FREQ/DIST on the main menu and adjust the start and stop frequency values if needed.
If the active calibration type is Standard and USER CAL is on, a warning message is displayed informing you that USER CAL must be turned off. You can use the Flex calibration type to allow frequency changes with USER CAL on.
2. Select CALIBRATION on the main menu and ensure USER CAL is off.
3. Select METHOD and select OSL.
4. Select TYPE and select either Standard or Flex.
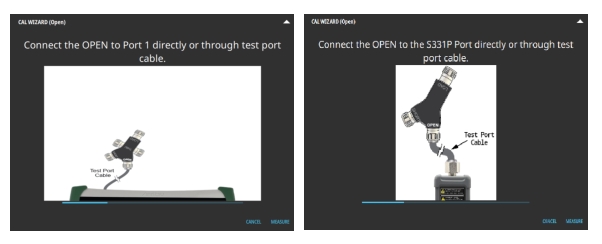
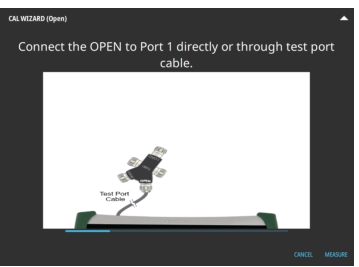
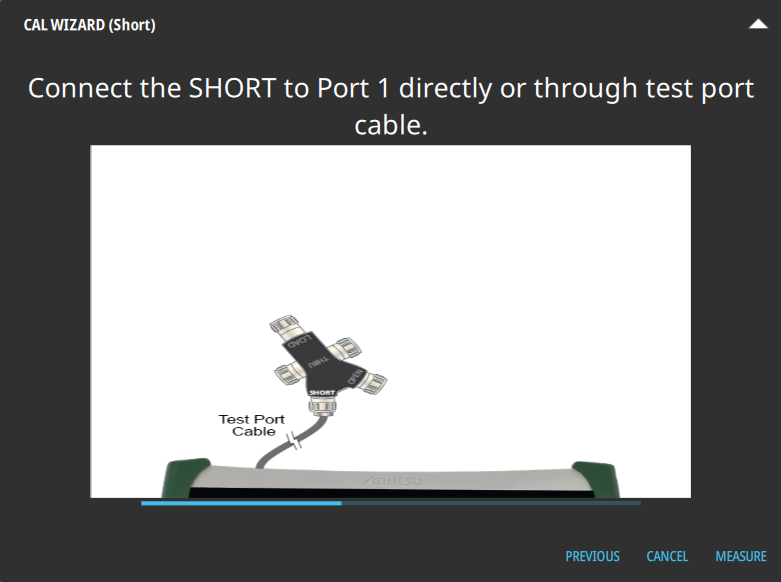
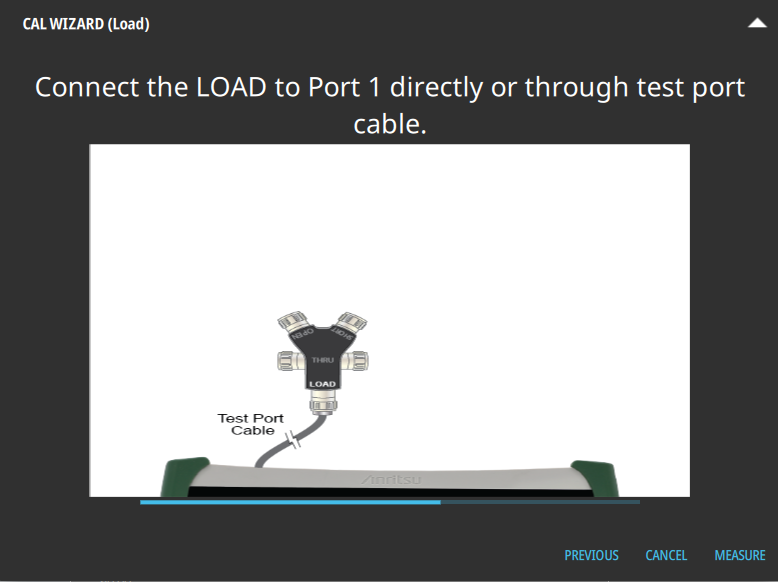
5. Select START CAL and follow the on-screen CAL WIZARD.
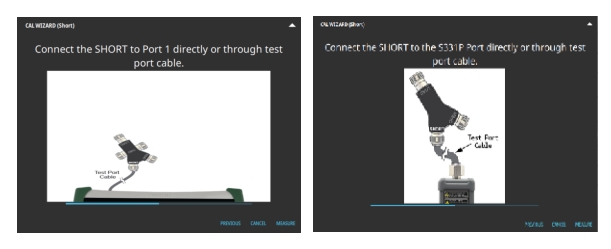
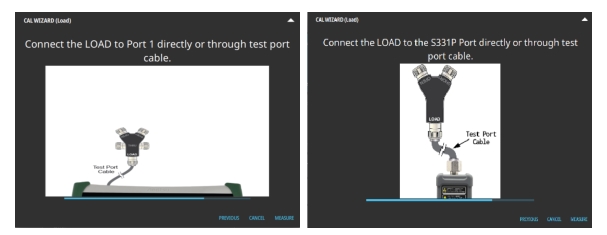
6. Select MEASURE at the end of each step to proceed to the next step in the sequence.
OSL Calibration - OPEN (Left: Site Master Instruments, Right: Field Master Instruments)
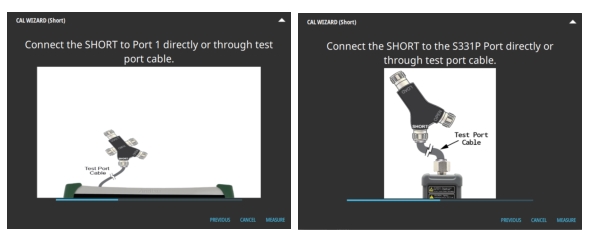
OSL Calibration - SHORT (Left: Site Master Instruments, Right: Field Master Instruments)
OSL Calibration - LOAD ((Left: Site Master Instruments, Right: Field Master Instruments)
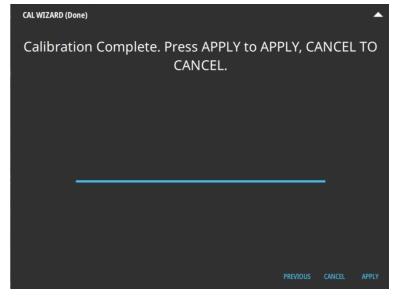
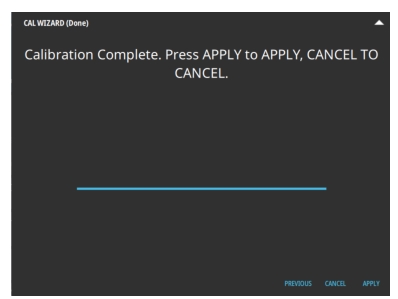
7. When done, select APPLY.
OSL Calibration - APPLY
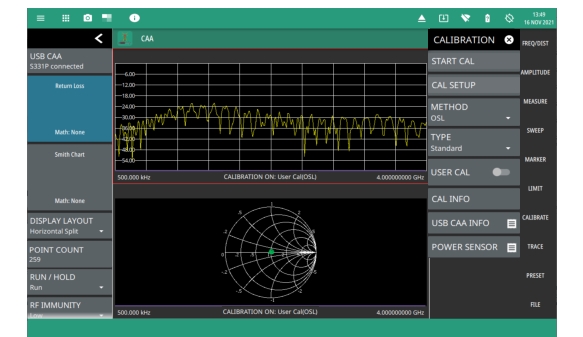
8. When calibration has completed, the user cal status message will display as follows:
CALIBRATION ON: User Cal (OSL) for Standard calibration type CALIBRATION ON: iUser Cal (OSL) for Flex calibration type
Follow the steps below to perform OSL + Transmission (USB Sensor) calibration method:
1. Ensure that an external USB power sensor is connected to the instrument.
2. Select FREQ/DIST on the main menu and adjust the start and stop frequency values if needed.
If the active calibration type is Standard and USER CAL is on, a warning message is displayed informing you that USER CAL must be turned off. You can use the Flex calibration type to allow frequency changes with USER CAL on.
3. Select CALIBRATE on the main menu and ensure USER CAL is off.
4. Select METHOD and select OSL + Trans (USB Sen).
5. Select TYPE and select either Standard or Flex for the calibration type.
6. Select START CAL and follow the on-screen CAL WIZARD.
7. Select MEASURE at the end of each step to proceed to the next step in the sequence. )
OSL +Trans (USB Sen) Calibration - OPEN (Left: Site Master Instruments, Right: Field Master Instruments)
OSL +Trans (USB Sen) Calibration - SHORT (Left: Site Master Instruments, Right: Field Master Instruments)
OSL +Trans (USB Sen) Calibration - LOAD (Left: Site Master Instruments, Right: Field Master Instruments)
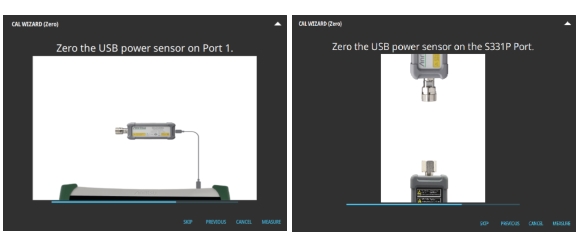
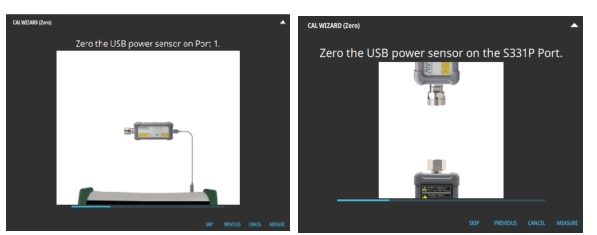
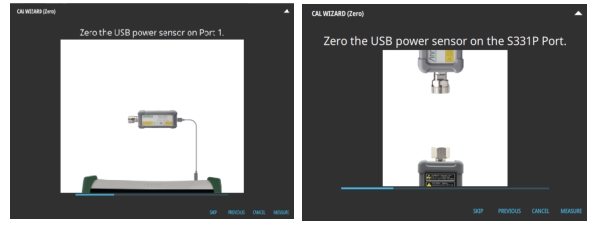
OSL +Trans (USB Sen) Calibration - ZERO (ensure nothing is connected to sensors) (Left: Site Master Instruments, Right: Field Master Instruments)
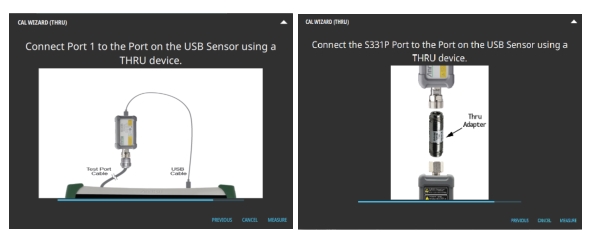
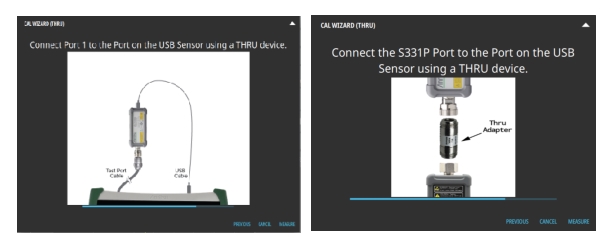
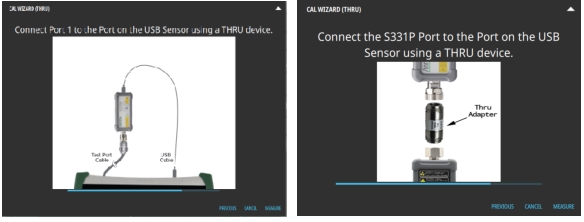
OSL +Trans (USB Sen) Calibration - THRU (Left: Site Master Instruments, Right: Field Master Instruments)
8. When done, select APPLY.
OSL +Trans (USB Sen) Calibration - APPLY
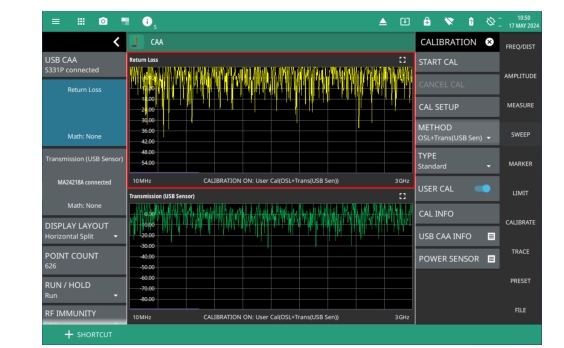
9. When the calibration has completed, the user cal status message will display as follows:
CALIBRATION ON: for Standard calibration type CALIBRATION ON: for Flex calibration type
OSL +Trans (USB Sen) Calibration, Standard (Site Master Series)
Transmission (USB Sensor) Calibration
Follow the steps below to perform Transmission (USB Sensor) calibration method:
1. Ensure that an external USB power sensor is connected to the instrument.
2. Select FREQ/DIST on the main menu and adjust the start and stop frequency values if needed.
If the active calibration type is Standard and USER CAL is on, a warning message is displayed informing you that USER CAL must be turned off. You can use the Flex calibration type to allow frequency changes with USER CAL on.
3. Select CALIBRATE on the main menu and ensure USER CAL is off.
4. Select METHOD and select Transmission (USB Sen).
5. Select TYPE and select either Standard or Flex for the calibration type.
6. Select START CAL and follow the on-screen CAL WIZARD prompts.
7. Select MEASURE at the end of each step to proceed to the next step in the sequence.
Transmission (USB Sen) Calibration - ZERO (ensure nothing is connected to sensor) (Left: Site Master Instruments, Right: Field Master Instruments)
Transmission (USB Sen) Calibration- THRU
8. When done, select APPLY.
Transmission (USB Sen) Calibration - APPLY
9. When the calibration has completed, the user cal status message will display as follows:
CALIBRATION ON: for Standard calibration type CALIBRATION ON: i for Flex calibration type
Follow the steps below to perform OSL + 2-Port Transmission calibration method:
Note
OSL + 2-Port Transmission calibration method is only available when Option 21 is installed which applies to Site Master instruments, only.
1. Ensure that an external USB power sensor are connected to the instrument.
2. Select FREQ/DIST on the main menu and adjust the start and stop frequency values if needed.
If the active calibration type is Standard and USER CAL is on, a warning message is displayed informing you that USER CAL must be turned off. You can use the Flex calibration type to allow frequency changes with USER CAL on.
3. Select CALIBRATE on the main menu and ensure USER CAL is off.
4. Select METHOD and select .
5. Select TYPE and select either Standard or Flex for the calibration type.
6. Select START CAL and follow the on-screen CAL WIZARD prompts.
7. Select MEASURE at the end of each step to proceed to the next step in the sequence.
OSL + 2-port Transmission Calibration - OPEN
OSL + 2-port Transmission Calibration - SHORT
OSL + 2-port Transmission Calibration - LOAD
OSL + 2-port Transmission Calibration - THRU
8. When done, select APPLY.
OSL + Transmission (2-port) Calibration - APPLY
9. When calibration has completed, the user cal status message will display as follows:
CALIBRATION ON: User Cal (OSL+Trans (Port 2) for Standard calibration type CALIBRATION ON: iUser Cal (OSL+Trans (Port 2) for Flex calibration type
Follow the steps below to perform 2-Port Transmission calibration method:
Note
2-Port Transmission method is only available when Option 21 is installed which applies to Site Master instruments, only.
1. Ensure that an external USB power sensor are connected to the instrument.
2. Select FREQ/DIST on the main menu and adjust the start and stop frequency values if needed.
If the active calibration type is Standard and USER CAL is on, a warning message is displayed informing you that USER CAL must be turned off. You can use the Flex calibration type to allow frequency changes with USER CAL on.
3. Select CALIBRATE on the main menu and ensure USER CAL is off.
4. Select METHOD and select .
5. Select TYPE and select either Standard or Flex for the calibration type.
6. Select START CAL and follow the on-screen CAL WIZARD.
7. Select MEASURE at the end of each step to proceed to the next step in the sequence.
2-port Transmission Calibration - THRU
8. When done, select APPLY.
(2-port Transmission Calibration - APPLY
9. When calibration has completed, the user cal status message will display as follows:
CALIBRATION ON: User Cal (Trans (Port 2) for Standard calibration type CALIBRATION ON: iUser Cal (Trans (Port 2) for Flex calibration type
Follow the steps below to perform iOSL calibration method:
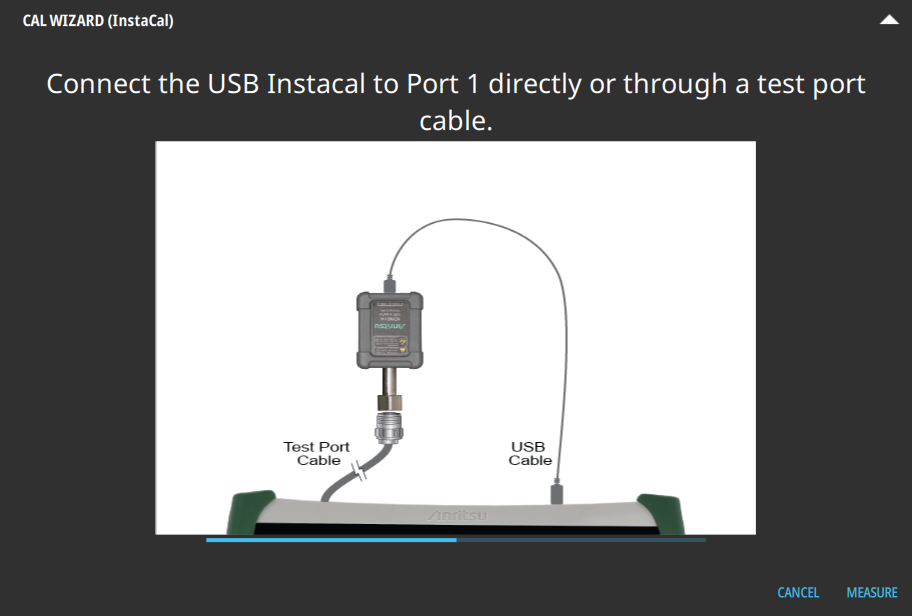
1. Ensure that an InstaCal ICN51A is connected to the instrument.
2. Select FREQ/DIST on the main menu and adjust the start and stop frequency values if needed.
If the active calibration type is Standard and USER CAL is on, a warning message is displayed informing you that USER CAL must be turned off. You can use the Flex calibration type to allow frequency changes with USER CAL on.
3. Select CALIBRATE on the main menu and ensure USER CAL is off.
4. Select METHOD and select iOSL.
5. Select TYPE and select either Standard or Flex for the calibration type.
6. Select START CAL and follow the on-screen CAL WIZARD.
7. Select MEASURE at the end of each step to proceed to the next step in the sequence.
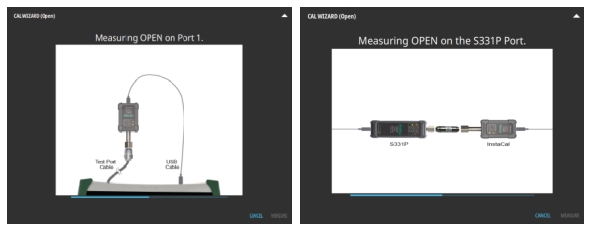
iOSL Calibration - MEASURE (Left: Site Master Instruments, Right: Field Master Instruments)
iOSL Calibration - MEASURE (Left: Site Master Instruments, Right: Field Master Instruments)
8. When done, select APPLY.
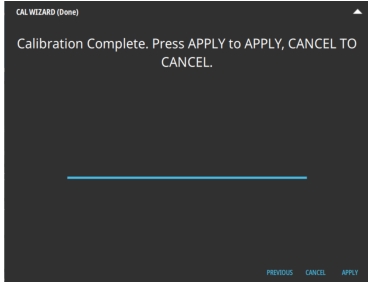
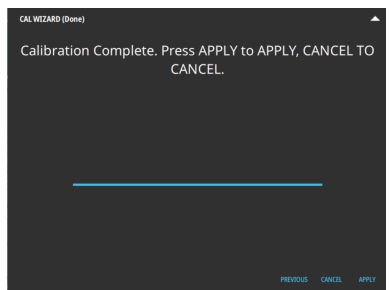
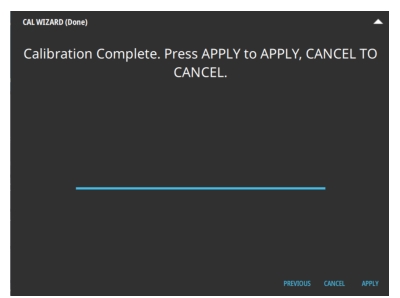
iOSL Calibration - APPLY
9. When calibration has completed, the user cal status message will display as follows:
CALIBRATION ON: User Cal (iOSL) for Standard calibration type CALIBRATION ON: iUser Cal (iOSL) for Flex calibration type
Follow the steps below to perform iOSL + Transmission (USB sensor) calibration method:
1. Ensure that an external USB power sensor and InstaCal ICN51A are connected to the instrument.
2. Select FREQ/DIST on the main menu and adjust the start and stop frequency values if needed.
If the active calibration type is Standard and USER CAL is on, a warning message is displayed informing you that USER CAL must be turned off. You can use the Flex calibration type to allow frequency changes with USER CAL on.
3. Select CALIBRATE on the main menu and ensure USER CAL is off.
4. Select METHOD and select iOSL + Trans(USB Sen).
5. Select TYPE and select either Standard or Flex for the calibration type.
6. Select START CAL and follow the on-screen CAL WIZARD.
7. Select MEASURE at the end of each step to proceed to the next step in the sequence.
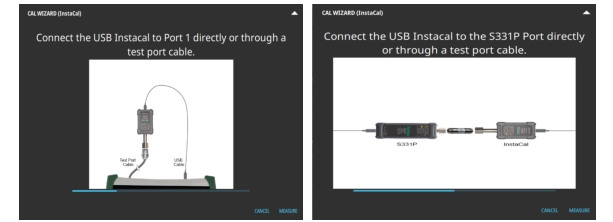
iOSL + Transmission (USB Sensor) Calibration - MEASURE (Left: Site Master Instruments, Right: Field Master Instruments)
iOSL + Transmission (USB Sensor) Calibration - ZERO (ensure nothing is connected to sensors) (Left: Site Master Instruments, Right: Field Master Instruments)
9. When calibration has completed, the user cal status message will display as follows:
CALIBRATION ON: User Cal (iOSL + Trans (USB Sen)) for Standard calibration type CALIBRATION ON: iUser Cal (iOSL + Trans (USB Sen)) for Flex calibration type
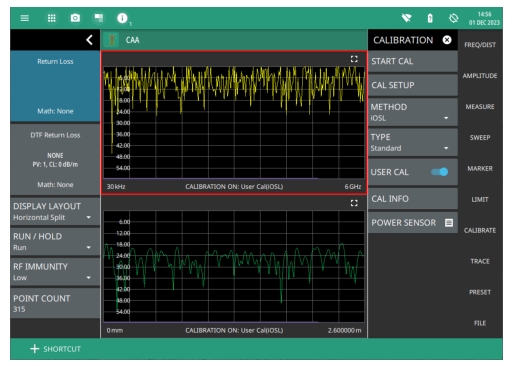
Figure: iOSL + Trans (USB Sen) Calibration, Standard illustrates both return loss and DTF return loss measurements after a standard iOSL +Transmission (USB Sensor) calibration. The calibration is not applied to Transmission measurement.
Follow the steps below to perform iOSL + 2-Port Transmission calibration method:
Note
OSL + 2-Port Transmission Calibration method is only available when Option 21 is installed which applies to Site Master instruments, only.
1. Ensure that an InstaCal ICN51A is connected to the instrument.
2. Select FREQ/DIST on the main menu and adjust the start and stop frequency values if needed.
If the active calibration type is Standard and USER CAL is on, a warning message is displayed informing you that USER CAL must be turned off. You can use the Flex calibration type to allow frequency changes with USER CAL on.
3. Select CALIBRATE on the main menu and ensure USER CAL is off.
4. Select METHOD and select iOSL + .
5. Select TYPE and select either Standard or Flex for the calibration type.
6. Select START CAL and follow the on-screen CAL WIZARD.
7. Select MEASURE at the end of each step to proceed to the next step in the sequence.
iOSL + Calibration - MEASURE
iOSL + Calibration - THRU
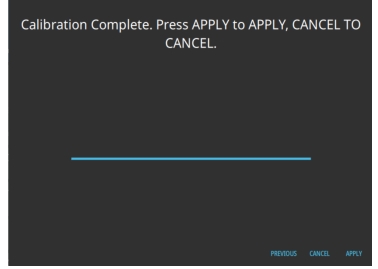
8. When done, select APPLY.
9. When calibration has completed, the user cal status message will display as follows:
CALIBRATION ON: User Cal (iOSL + for Standard calibration type CALIBRATION ON: iUser Cal (iOSL + ) for Flex calibration type
Figure: iOSL + Calibration, Standard illustrates a return loss and DTF return loss measurements after a standard iOSL + 2-Port Transmission calibration.