Electromagnetic Field (EMF) Meter Measurement Guide : EMF Meter (Option 445) : EMF Meter GUI Overview
 
EMF Meter GUI Overview
EMF Meter limit testing is set up using the LIMIT Menu (EMF Meter). After completing the data collection for the three axes (X, Y, and Z), the isotropic result is calculated and displayed for each sample. Up to 16 samples can be saved into a single file. The max, min, and average values of the isotropic result are computed and displayed in the table below the graph region for each sample. The current sample data is displayed at the top of the display area.
EMF Meter Measurement
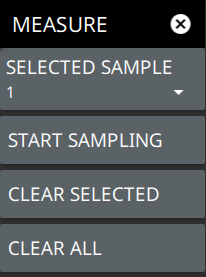
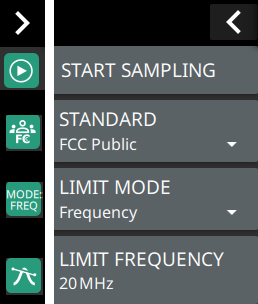
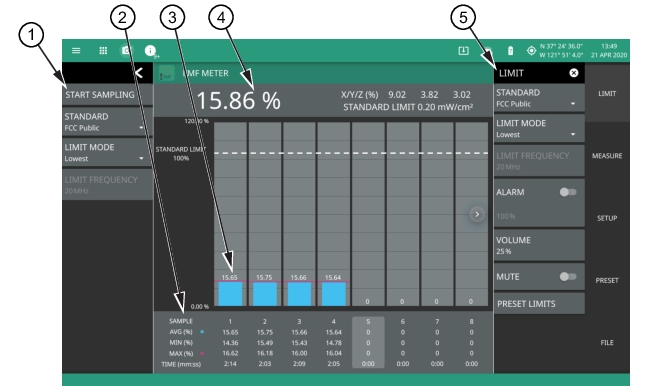
1. The status panel provides controls for starting a new set of eight measurement samples across the frequency range of the connected probe, selecting the standard for the limit test, and for selecting the limit mode (lowest or selected frequency).
2. Tabular measurement data shows the EMF measurement results (average, maximum, and minimum) along with the test time for each sample.
3. The bar graph area displays the sampled result on a percentage scale relative to the current test limit.
4. The upper data area shows the currently selected sample data for each axis and the calculated total result (%) along with the currently set standard limit in mW/cm2.
5. The LIMIT menu is where most of the EMF measurement settings are configured. See LIMIT Menu (EMF Meter).
EMF Meter Measurement
Press START SAMPLING and move the EMF probe through the sector of interest. The EMF probe handle can be removed and the probe can be attached to a standard tripod with a ¼ inch mounting screw for stationary measurements. When finished measuring a sector, press STOP SAMPLING. The meter will automatically save the data to the current sample and then move to the next sample. Up to 16 samples can be taken by starting and stopping the sampling. The data can then be saved as a screenshot (png) or as a comma separated value (csv) file and viewed on a PC.
LIMIT Menu (EMF Meter)
The EMF Meter measurement is primarily set up using the LIMIT menu.
LIMIT Menu (EMF Meter)
 
STANDARD
Selects the limit test standard to use for compliance testing:
FCC Public: FCC field density limit for the general public
FCC Workers: FCC field density limit for the workers
Icpublic: International Commission on Non-Ionizing Radiation Protection (ICNIRP) limit for the general public
Icworker: International Commission on Non-Ionizing Radiation Protection (ICNIRP) limit for workers
LIMIT MODE
Selects the lowest limit value within the frequency range of the probe or the limit value of the specified frequency. Note that selecting "frequency" does not mean that the probe is only measuring at the set frequency. It is still a broadband measurement. Frequency limit mode means that the percentage calculation of the EMF energy is based on the limit of the set frequency.
LIMIT FREQUENCY
When LIMIT MODE is set to frequency, the test limit criteria is applied at the set frequency rather than the lowest limit within the EMF probe frequency range.
ALARM
Toggles the alarm on or off. An alarm will sound when a test limit threshold for any sample is crossed.
VOLUME
Sets the alarm volume from 0% to 100%.
MUTE
Sets the alarm volume to minimum (effectively 0%).
PRESET LIMITS
Presets all limit parameters to factory default.
MEASURE Menu (EMF Meter)
The MEASURE menu is used to select a sample and to start sampling a new set of data.
MEASURE Menu (EMF Meter)
 
SELECTED SAMPLE
Selects one of the 16 available samples. The selected sample is where data will be stored when START SAMPLING is pressed. The selected sample is highlighted in the tabular display area and can also be selected by touching the bar graph or table area of the desired sample.
START SAMPLING
Initiates a new measurement. During a series of measurements, the meter will cycle through and update each of the 16 sample data sets. After pressing, this button will become STOP SAMPLING and can be pressed to stop the current sample. After stopping a sample, the selected sample will automatically increment to the next available sample.
CLEAR SELECTED
Clears the currently selected sample data.
CLEAR ALL
Clears all 16 sets of sampled data.
SETUP Menu (EMF Meter)
The SETUP menu is used to toggle the EMF Meter probe calibration.
SETUP Menu (EMF Meter)
 
EMF METER CAL
Toggles the internal EMF Meter probe calibration on or off. This enables correction factors that are stored in the probe’s memory. The measured values are corrected at a given frequency using the factors measured during the latest factory calibration.
PROBE INFO
Displays EMF Probe details such as Model, Unit and Year.
Status Panel (EMF Meter)
The figure 2-7 shows status panel with mini status panel icons.
Status Panel with Mini Status Panel Icons (EMF Meter)
 
START SAMPLING
Initiates a new measurement. During a series of measurements, the meter will cycle through and update each of the 16 sample data sets. After pressing, this button will become STOP SAMPLING and can be pressed to stop the current sample. After stopping a sample, the selected sample will automatically increment to the next available sample.
STANDARD
Selects the limit test standard to use for compliance testing:
FCC Public: FCC field density limit for the general public
FCC Workers: FCC field density limit for the workers
Icpublic: International Commission on Non-Ionizing Radiation Protection (ICNIRP) limit for the general public
Icworker: International Commission on Non-Ionizing Radiation Protection (ICNIRP) limit for workers
LIMIT MODE
Selects between lowest and frequency.
LIMIT FREQUENCY
When LIMIT MODE is set to frequency, the test limit criteria is applied at the set frequency rather than the lowest limit within the EMF probe frequency range.