: Instrument Overview : SETTINGS Menu : ETHERNET Settings
 
ETHERNET Settings
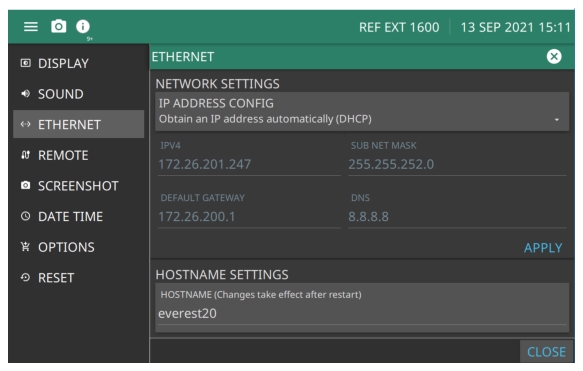
From the Settings menu, press Ethernet to display the screen shown in Figure: ETHERNET Menu. Refer to Network Settings for general network setup and information.
Press: 3-Line Icon | SETTINGS | ETHERNET
Note 
If an active Ethernet cable is connected to the instrument while it is turned on, a reboot may be required to establish a DHCP connection. If the port becomes inactive, verify that an active Ethernet cable is attached to the instrument, then cycle the instrument power off and on.
ETHERNET Menu
ID ADDRESS CONFIG
The instrument IP address can be set automatically using DHCP or manually by entering the desired IP address, gateway address, and subnet mask
IPV4
Press and type the IPV4 using the keypad. Press APPLY to enter changes.
DEFAULT GATEWAY
Press and type the Default Gateway using the keypad. Press APPLY to enter changes.
SUB NET MASK
Press and type the Sub Net Mask using the keypad. Press APPLY to enter changes.
DNS
Press and type the DNS using the keypad. Press APPLY to enter changes.
HOSTNAME SETTINGS
Press and type the Hostname using the keypad. Changes to the Hostname take affect after Restart
Editing Ethernet Settings
Press IPV4, SUB NET MASK, DEFAULT GATEWAY and DNS to display the touch screen keyboard. Type the parameters and press apply when complete. For more on keyboard entry, Text Entry.