Power flatness is checked by measuring the power level variation during a full band sweep in the step sweep mode.
1. Set up the MG362x1A as follows for a step sweep flatness test:
a. Reset the instrument by pressing 3-Line Icon | SETTINGS | RESET |RESET ALL. Upon reset, the FREQUENCY menu is displayed with frequency and set to default values.
b. Press FREQUENCY button to open the current frequency parameter for editing.
d. In the same menu screen, press the LEVEL button to open the current parameter for editing and set LEVEL to the maximum specified noted in the data sheet (use a fixed attenuator when measuring s above +19 dBm).
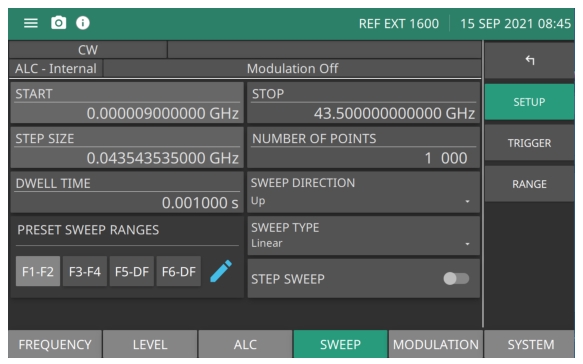
e. Press SWEEP | STEP to show the step sweep menu as shown below.
Step Sweep Setup Menu
f. Set START to the lowest frequency of the instrument and set STOP to the highest frequency of the instrument for a full frequency sweep.
g. Set the DWELL TIME to 1 second, or to a time that is comfortable between recordings.
h. Set the NUMBER OF POINTS to 100.
2. Press the TRIGGER menu.
3. Press TRIGGER SWEEP button to start a sweep.
4. As the MG362x1A steps through the full frequency range, observe the maximum and minimum power meter readings and record the values on the test record. Verify that the variation (difference between the maximum and minimum readings) does not exceed the value noted in Table: Flatness Test Record. The sweep may be repeated as necessary by pressing the TRIGGER button.
Flatness Test Record
Model MG362x1A
Serial Number:
Date:
Set Power
Maximum Power
Minimum Power
Variation(4)
+0 dBm
dBm
dBm
dB
(4)Maximum variation is 1.6 dB for standard power instruments and 3.0 dB for high power (Option 15) instruments.