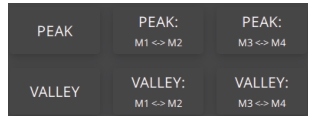
Press will use the marker selected to auto-search the entire trace data displayed and set the marker to the signal’s highest peak.
Press to set the selected marker to the highest peak in the trace display between Marker 1 and Marker 2.
Press to set the selected marker to the highest peak in the trace display between Marker 3 and Marker 4.
Press will use the marker selected to auto-search the entire trace data displayed and set the marker to the signal’s lowest valley.
Press to set the selected marker to the lowest valley in the trace display between Marker 1 and Marker 2.
Press to set the selected marker to the lowest valley in the trace display between Marker 3 and Marker 4.
Positioning Markers
Use the MARKER SEARCH menu to position markers.
Position Marker to Peak
1. Press a marker button as described in Marker Buttons.
2. Press the PEAK button. The marker will position to the highest point in the trace data display. The frequency value of the marked highest data point of the trace data will be entered into the FREQUENCY window.
Move Marker to Valley
1. Press a marker button as described in Marker Buttons.
2. Press the VALLEY button. The marker will position to the lowest point in the trace data display. The frequency value of the marked lowest data point of the trace data will be entered into the FREQUENCY window.
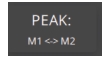
Set a Marker Using PEAK M1<->M2
1. Press to activate Marker 1 (M1) and Marker 2 (M2).
2. Press the Peak M1<->M2 button. The marker will position to the highest point between Marker 1 and Marker 2. If Marker 1 and Marker 2 have not been preselected, a peak marker will display between a previously set Marker 1 and Marker 2 position on the trace data display.
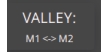
Set a Marker Using VALLEY M1<->M2
1. Press to activate Marker 1 (M1) and Marker 2 (M2).
2. Press the VALLEY M1<->M2 button. The marker will position to the lowest point between Marker 1 and Marker 2. If Marker 1 and Marker 2 have not been preselected, a valley marker will display between a previously set Marker 1 and Marker 2 position on the trace data display.
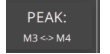
Set a Marker Using PEAK M3<->M4
1. Press to activate Marker 3 (M3) and Marker 4 (M4).
2. Press the Peak M3<->M4 button. The marker will position to the highest point between Marker 3 and Marker 4. If Marker 3 and Marker 4 have not been preselected, a peak marker will display between the previously set Marker 3 and Marker 4 position on the trace data display.
Set a Marker Using VALLEY M3<->M4
1. Press to activate Marker 3 (M3) and Marker 4 (M4).
2. Press the VALLEY M3<->M4 button. The marker will position to the lowest point between Marker 3 and Marker 4. If Marker 3 and Marker 4 have not been preselected, a valley marker will display between the previously set Marker 3 and Marker 4 position on the trace data display.
Move a Marker
Move a marker by typing a frequency value
1. Press the desired marker button.
2. Type a value into the Frequency entry window. The marker positions at the frequency on the trace data.
Move a marker manually
1. Press the desired marker button.
2. Click and drag the marker manually. Read the frequency readout in the FREQUENCY field.
Activate Delta Markers
1. Press the associated delta marker button.
2. Enter a frequency in the delta frequency entry window. The delta marker will move to the delta frequency position.