The measurement frequency can be set by entering the center frequency or by selecting the applicable signal standard and channel, which allows the instrument to automatically set the frequency.
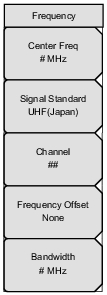
Frequency Menu
To Set Measurement Frequency by Entering Center Frequency:
1. Press the Frequency main menu key to display the Frequency Menu (Figure: Frequency Menu).
2. Press the Center Freq submenu key to open the Frequency Editor dialog box.
3. Enter the required frequency by using the Up/Down arrow keys or the rotary knob, then press the Enter key. You may also use the keypad to enter a frequency.
When entering a frequency by using the keypad, the Frequency menu changes temporarily to a Units menu with submenu keys for GHz, MHz, kHz, and Hz. Press the appropriate units key. Pressing the Enter key has the same effect as pressing the MHz submenu key.
The current setting is shown at the top of the instrument settings summary column on the left side of the measurement screen.
To Set Measurement Frequency by Selecting a Signal Standard:
1. Press the Frequency main menu key.
2. Press the Signal Standard submenu key to open the Signal Standards list box. Select the desired signal standard by using the Up/Down arrow keys or the rotary knob, then press the Enter key.
When a signal standard is selected, the center frequency is automatically tuned for the channel of the selected standard.
3. Press the Channel submenu key to open the Channel Editor dialog box and set the channel within the specified range.
4. If necessary, press the Frequency Offset submenu key to open the Select Frequency Offset dialog box. Set the channel frequency offset by using a value from the dialog box.