LMR Master™S412E User Guide : System Operations : System Options Menu : System Options 2/2 Menu
 
System Options 2/2 Menu
Key Sequence: Shift > System (8) > System Options > More
System Options Menu 2/2)
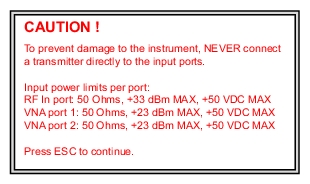
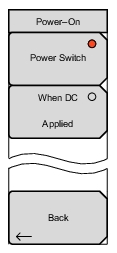
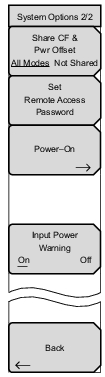
Share CF & Pwr Offset
All Modes Not Shared
Press this submenu key to toggle the setting between All Modes and Not Shared. Select All Modes to have the current center frequency setting and power offset setting carried over when changing measurement modes. This function is not applicable to measurements that do not have a center frequency or power offset setting or to measurements in which the current center frequency or power offset setting is outside the range of the new measurement.
Set Remote Access Password
Press this submenu key to open the Password entry dialog (see Figure: Remote Access Password Dialog). Use the touch screen keyboard to enter the new password. Passwords may contain digits, uppercase and lowercase letters, and the symbols - _ + . (hyphen, underscore, plus, period). Press Enter to save or Esc to cancel.
Setting the remote password and rebooting the instrument will lock it from Telnet and FTP connections. This means that connecting to the instrument via Master Software Tools (v2.21.1 or later), Wireless Remote Tools (WRT), or the Web Remote Control browser interface will require the set password. To unlock the instrument, remove the password by setting it to blank. The password is also removed following a Master Reset, Factory Defaults reset, or a firmware update.
Power–On
Press this submenu key to open the Power–On Menu.
Input Power Warning
On  Off
Press this submenu key to toggle a brief display of the input power caution message at startup (see Figure: Input Power Caution Text Box).
Back
Press this submenu key to return to the System Options Menu.
Warning 
Do not set a remote access password when using SCPI commands to communicate with the instrument.
Remote Access Password Dialog
 
Input Power Caution Text Box
Power–On Menu
Key Sequence: Shift > System (8) > System Options > More > Power–On
Power–On Menu
 
 
Power Switch
Press this submenu key to set the LMR Master for normal use of the On/Off button on the instrument front panel.
When DC Applied
Press this submenu key to set the LMR Master to automatically restart when DC power is applied to the External Power connector (see Figure: Test Panel Connectors). Refer to External Power On.
In this mode, the Power button does not turn off the instrument, merely recycles it.
 
Back
Press this submenu key to return to the System Options 2/2 Menu.
Display Settings Menu
Key Sequence: Shift, System (8) > System Options > Display
Display Settings Menu
 
 
Brightness:
 
Display Blank
Opens the message box illustrated in Figure: Display Blank Message Box. Press Enter to turn off the display, or press Esc to abort. To turn the display back on, press any key (except the Power button) three times in rapid succession. A power cycle also turns the display back on.
Default Colors
Sets the display colors to the factory defaults. Used for normal viewing.
Black on White
Sets the display colors to black on a white background for printing and viewing in broad daylight conditions. See Figure: LMR Master Display Settings for illustrations of the display color schemes selectable in this submenu.
Night Vision
Sets the display to a red-tinted color on a black background. The front panel keypad is backlighted in red. This setting is optimized for nighttime viewing.
High Contrast:
Increases the black-and-white contrast of the default display. This setting is used in challenging viewing conditions.
Color on White
Sets the display background to white, the grid to gray, and leaves sweep data in color. This setting is used for printing and viewing in broad daylight conditions.
Back
Press this submenu key to return to the System Options Menu.
Display Blank Message Box
Brightness Settings Menu
Key Sequence: Shift, System (8) > System Options > Display > Brightness
Brightness Settings Menu
The brightness of the display can be adjusted to optimize viewing under a wide variety of lighting conditions.
Brightness:
Press this key to open the Brightness Editor window, where you can adjust the display brightness level from 0 to 100, with 100 being the brightest. See Figure: Brightness Editor Input Box. Use the rotary knob to adjust the value in increments of 5, or press the Up/Down arrow keys to change the value in increments of 25. Press the Left or the Right arrow key to jump to 0 or 100, respectively. Press Enter to accept the change; press Esc to retain the previous setting. All display elements on the instrument screen are affected by the Brightness setting.
Auto Dim On/Off
Press this key to toggle the display auto-dimming feature on and off. Enabling auto-dim can extend battery life.
Auto Dim Delay
Press this key to adjust the amount of idle time, from 1 to 15 minutes, before the instrument display goes dim. Use the arrow keys or the rotary knob to adjust the value in increments of 1 minute. You can also use the numeric keypad, then press Enter. Out-of-range values are ignored and decimal entries are rounded down to next lower minute.
Auto Dim Brightness
Press this key to select the brightness percentage level of the display when it is dimmed. Use the arrow keys or the rotary knob to adjust the value in increments of 5%, from 0% to 25%. You can also use the numeric keypad, then press % or the Enter key. Out-of-range values are ignored.
Back
Press this key to return to the Display Settings Menu.
Brightness Editor Input Box