: Instrument Operation : CW Frequency Operation : FREQUENCY Menu
 
FREQUENCY Menu
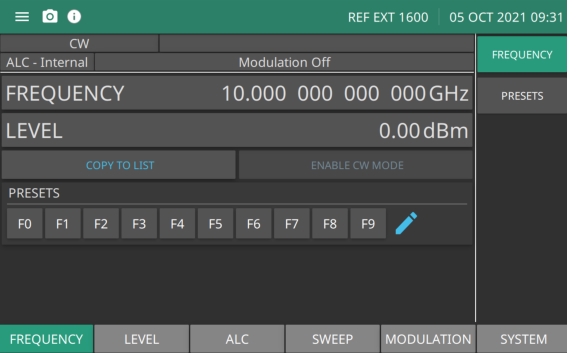
The signal generator produces discrete CW frequencies across the frequency range of the instrument. The FREQUENCY menu is shown in Figure: Frequency Menu. Refer to the following sections for FREQUENCY setting and operation.
Frequency Menu
Frequency
Press to type or edit a CW frequency.
MG36221A Frequency Range: 9kHz to 20.0 GHz
MG36241A Frequency Range: 9kHz to 43.5 GHz
MG36271A Frequency Range: 9kHz to 70.0 GHz
Level
Press to type or edit a power level.
Range: –130 dBm to 33 dBm with step attenuator: –20 to 33 dBm without step attenuator
COPY TO LIST
Copies the set frequency and level parameters to the LIST menu. See LIST Menu.
Enable CW Mode
When pressed, CW mode is enabled. If a sweep is in progress, pressing ENABLE CW MODE will stop the sweep and CW mode will be enabled.
PRESETS
Press to type or edit a CW Frequency in the Presets list. Press the pencil icon to edit an F0 - F9 preset frequency, or select the PRESETS menu from the right column of the Frequency menu. See the FREQUENCY PRESETS Menu.
Edit the CW Frequency
To select a CW frequency for output, edit the current frequency, enter a new frequency, or select one of the preset frequency parameters from the PRESET menu. To place the MG362x1A in the CW frequency mode, go to the main menu:
Press: FREQUENCY
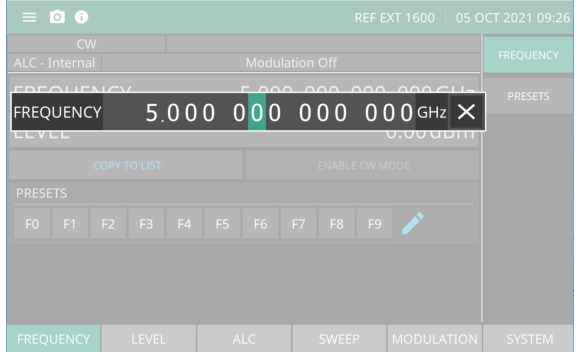
The frequency edit window is displayed as shown in Figure: Frequency Entry. Enter new CW frequency or edit the current CW frequency using the cursor control keys, the rotary data knob, or the front panel keypad and the appropriate terminator button. If a parameter was selected in error and no editing is required, click outside the active window or click a terminator to close.
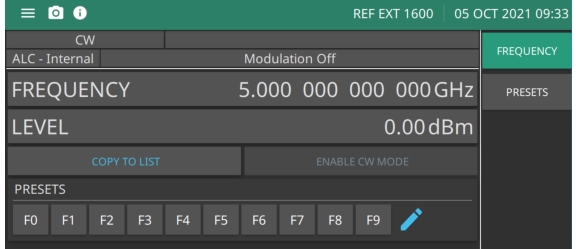
Once a CW frequency has been entered into the field, press a terminator button and then press outside the entry window to show the frequency in the LCD display as shown in Figure: Frequency Entered.
Frequency Entry
Frequency Entered