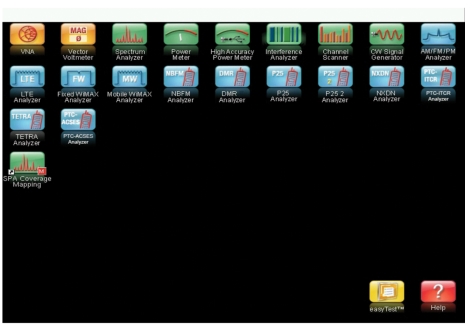
Press this key to display a grid of shortcut icons for installed measurement modes and any user‑selected menus and setup files that may have been added.
Figure: Menu Key Screen, Icons for Installed Measurements shows the Menu key screen with shortcut icons for the installed measurement modes. Touch one of the icons in the top row to change modes. These top‑row icons are preinstalled and cannot be moved or deleted.
Menu Key Screen, Icons for Installed Measurements
Note
The display of the Menu screen varies depending on your LMR Master model and installed options.
Only the Esc key and the touch screen icons are functional in the Menu screen.
The instrument must be in a measurement mode to execute a function that is indicated in blue text above the number key. They do not function from the Menu screen.
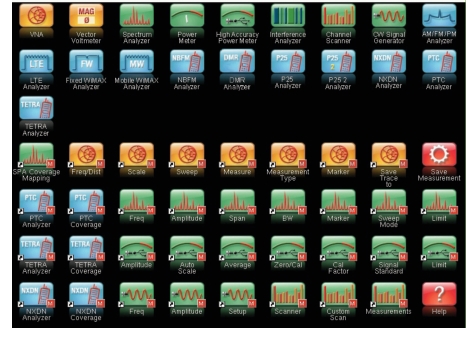
Press and hold down any touch‑screen key for a few seconds to add a shortcut to this screen. To add shortcut setup files (*.stp), open the recall menu and hold down on the file name for several seconds. Then select the location for the shortcut.
Menu Key Screen with User-Defined Shortcuts
User‑defined shortcuts stay in memory until deleted. To delete or move a shortcut button, press the Menu key, then press and hold the shortcut for approximately 3 seconds. The Customize Button dialog box opens to allow a button to be deleted or moved. Press Esc to exit the Menu shortcut display.
Note
The Factory Default reset deletes all user created shortcut icons from the Menu screen. Refer to Reset Menu for additional information.
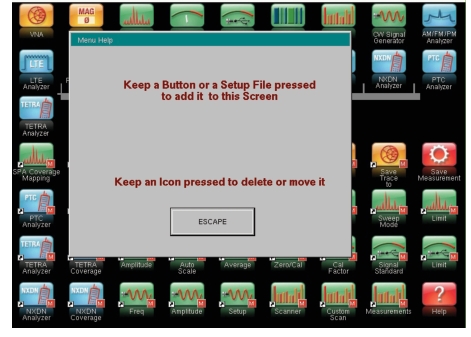
Help for the Menu shortcut screen is available by pressing the icon in the lower‑right corner of the display.
Menu Help
Esc Key
Press this key to cancel any setting that is currently being made.
Enter Key
Press this key to finalize data input or select a highlighted item from a list.
Arrow Keys
The four arrow keys (around the Enter key) are used to scroll up, down, left, or right. The arrow keys can often be used to change a value or to change a selection from a list. This function is similar to the function of the rotary knob. The arrow keys are also used to move markers.
Shift Key
Pressing the Shift key followed by pressing a number key executes the function that is indicated in blue text above the number key. When the Shift key is active, its icon is displayed at the top‑right of the measurement display area near the battery charge indicator.
Shift Key Icon
Number Keypad
The Number keypad has two functions: The primary function is number entry. The secondary function of the number keypad is to list various menus.
Rotary Knob
Turning the rotary knob changes numerical values, scrolls through selectable items from a list, and moves markers. Values or items may be within a dialog box or an edit window.