S820E Microwave Site Master™ User Guide : Calibration, VNA : Calibration Menu
 
Calibration Menu
Key Sequence: Calibration
Calibration Menu
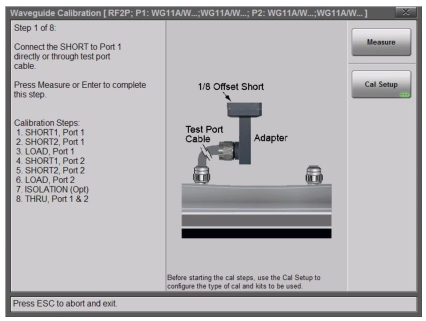
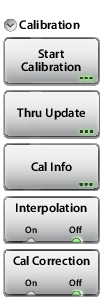
Calibration
 
Start Calibration
Opens the Calibration dialog box (Figure: Calibration Dialog Box). Two menu buttons are displayed in the Calibration dialog box.
Thru Update
Opens the Calibration dialog box to allow calibrating the Thru component without repeating the entire calibration sequence. This key is displayed only after a calibration with a Thru component.
Cal Info
Displays the Calibration Information table showing the current and active calibration settings. See Figure: Cal Info Window.
Interpolation (On Off)
Press this submenu key to toggle Interpolation On or Off. After performing a Standard calibration, you can turn Interpolation On and then change the frequency range (smaller) or change the number of data points. For more details, refer to Interpolation.
Cal Correction (On Off)
Press this submenu key to toggle Cal Correction On or Off. Turn Cal Correction On to apply the correction factor to the current measurement. For more details, refer to Cal Correction.
 
Interpolation
You can set your instrument to interpolate the calibration coefficients of a Standard mode calibration. After performing a Standard calibration, you can turn Interpolation On and then change the frequency range (smaller and anywhere within the calibrated range) or change the number of data points. You cannot increase the frequency range beyond the range that was used during calibration. The submenu key is Interpolation (On Off).
For example, you could perform a calibration from 1 MHz to 40 GHz using 4001 points. With Interpolation On, you could then make a measurement by zooming in on a desired frequency range, 410 MHz to 435 MHz for example. The trace in your measurement would use of the full 4001 points within this much narrower frequency range. With Interpolation Off, the instrument would use only the number of points that were calibrated within this narrower frequency band, which would be a much smaller number of points.
Cal Correction
Cal Correction is turned on automatically after the calibration process has been completed successfully. When Cal Correction is On, the calibration coefficients are applied to the measured data, resulting in corrected S‑parameter data. You can turn Cal Correction Off, which results in trace data using uncorrected (or raw) S‑parameter data.
 
Calibration Dialog Box
Key Sequence: Calibration > Start Calibration
Calibration Dialog Box
 
Measure:
Starts the calibrations process. Follow the on screen instructions.
 
Cal Setup:
Press this submenu key to choose a calibration type.