 |
 |
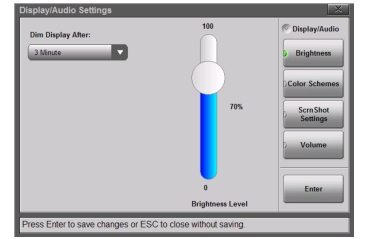
 | Brightness Press this key to access the display brightness settings. See Figure: Display Brightness Dialog. You can adjust the level for a wide variety of lighting conditions. Use the touchscreen, the Up/Down arrow keys, or the rotary knob to adjust the currently active setting. Press Enter to save the change or Esc to cancel. Display Auto‑dimming is enabled by default (1 minute) to extend battery life. Tap the Dim Display After bar to display the available drop-down selections for Auto‑dimming. You can choose to dim after a number of minutes (from 1, 2, 3, 5, 10, or 15) or choose Never. The default dim level is fixed at 3 minutes. |
 | Color Schemes Press this key and use the touchscreen to select Standard, Daytime, or Nighttime color scheme. Daytime increases the contrast of the display and is useful outdoors in bright light or other challenging viewing conditions. Nighttime sets the display to a darker red-tinted color scheme, useful in night-time viewing conditions. ScrnShot Settings Press to change the settings used when capturing a screen shot with the Under Image Capture Size, select Graph Only, or select Full Screen to capture the entire display screen including menu buttons. Under Background Color, select Inverted to remove the graph background color (useful for paper printing) or Standard for the typical black background. Use Image Header/Footer to select the location where the instrument model, name, and date stamp are displayed. Volume Press this submenu key to adjust the volume. The current volume setting is displayed. Use the touchscreen, the Up/Down arrow keys, or the rotary knob to change the volume and press the Enter key to accept the change. Enter Press this key or the Enter key on the number keypad to apply changes that have been set in the other Display/Audio submenus. |