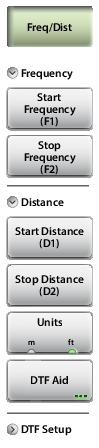
 | Frequency Changing the Start or the Stop Frequency requires turning off User Cal if the active Cal Type is Standard. Use Flex Cal to allow frequency range adjustments with User Cal on. Refer to Calibration Types. Start Frequency (F1) Press the Start Frequency (F1) submenu key and use the virtual keypad to enter the value in the edit box. See Figure: Entering Frequency Setting. Press one of the unit keys (GHz, MHz, kHz, or Hz) to apply the new value and close the edit box. To exit without making a change, press Esc to cancel the entered value if applicable, and Esc again to close the edit box. Stop Frequency (F2) Press the Stop Frequency (F2) submenu key and use the keypad to enter the value in the edit box, then press one of the unit keys to apply. Distance Start Distance (D1) Press the Start Distance (D1) submenu key and use the virtual keypad to enter the value in the edit box. See Figure: Entering Distance Setting. Press one of the unit keys as appropriate to apply the entered value and close the edit box. To exit without making a change, press Esc to cancel the entry, and Esc again to close the edit box. Stop Distance (D2) Press the Stop Distance (D2) submenu key and use the keypad to enter the value in the edit box, then press one of the unit keys to apply. Units Press the Units key to toggle distance units between meters and feet. DTF Aid Opens the DTF Aid dialog box (Figure: DTF Aid). This interactive parameter box gives access to multiple specifiable measurement settings and displays maximum testing distance and resolution. |