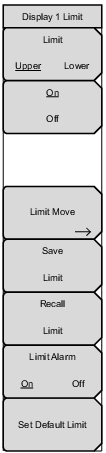
 | Limit Upper Lower Press this key to toggle between configuring either the upper or the lower limit (that is, make it active). On/Off Turns on or off the active limit line (upper or lower). See Figure: Limit Line Example. Limit Move Opens the Limit Move Menu. Save Limit Opens the Save Menu and displays a dialog to save the currently active limit line. You can enter a name for the saved limit line or apply the name suggested by the instrument (which is based on a previously saved name). Press Esc to cancel the save operation. Recall Limit Opens the Recall Menu and displays a dialog to recall a saved limit line. In the Recall dialog box, navigate to a previously saved limit line file and press Enter to recall. Press Esc to cancel. Limit Alarm On Off Press this key to turn on and off the alarm function for the currently active limit line. When on, an alarm beep will sound when any data point exceeds the limit. Set Default Limit Turns on the currently active limit line and places it at its default position in the sweep window. For the upper limit line, this is two and a half divisions below the top of the grid (or amplitude reference level). The lower limit line default position is two and a half divisions above the bottom of the sweep window. |